Solar Panel System Components Explained (Easy Guide)
Solar panel system components explained in plain English—panels, inverters, batteries, safety, and monitoring—so you can choose the right setup confidently.
Why I Finally Mapped My Whole System
When I first looked into solar, I thought panels were the whole story. I pointed at a shiny black rectangle and said, “That. I need that.” Then I saw the diagrams. Inverter types. Rapid shutdown. Net meters. My eyes glazed over.
So I did the simplest thing: I drew a crude sketch of how everything connects. That sketch saved me weeks of confusion and a couple of expensive re-do’s. In this guide, I’ll walk you through the same map—plain language, no fluff—so you can pick the right components with confidence.
Promise: By the end, you’ll know what each part does, how it fits, and a simple way to choose components for your home.
Skimmer’s Corner: The 10-Second System Map
- Sunlight → Panels → DC power
- Inverter (string, microinverters, or DC optimizers) → AC power
- (Optional) Battery + Hybrid inverter/charge controller
- Safety & BOS: racking, wiring, combiner, disconnects, breakers, rapid shutdown
- Meters & Monitoring: net meter / production meter + app/portal
Quick takeaway: Panels collect energy. Inverters make it usable. Batteries store it. Safety gear keeps it compliant. Meters and apps keep you informed.
Core Components at a Glance
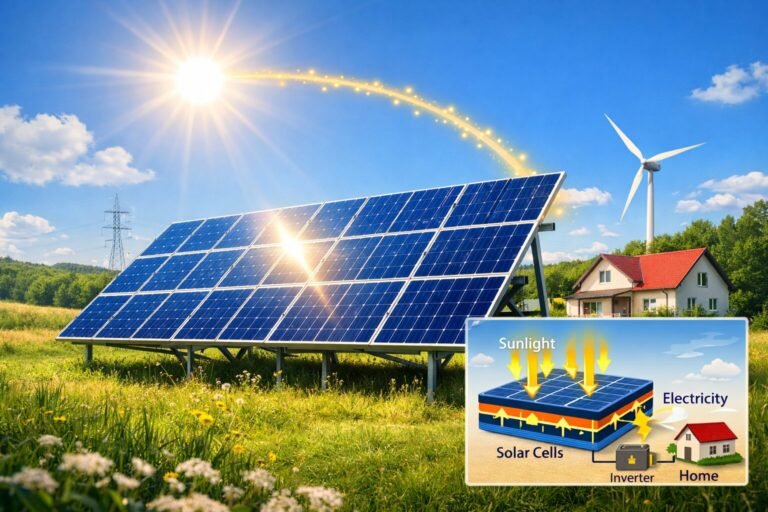
Solar Panels (Modules)
Panels turn sunlight into DC power. The spec sheet tells you three things I actually care about:
- Watts (W): nameplate output under test conditions.
- Efficiency (%): how much sunlight becomes electricity—handy when roof space is tight.
- Temperature coefficient: how performance changes on hot days.
Types you’ll hear about:
- Monocrystalline: high efficiency, sleek look.
- Polycrystalline: usually slightly lower efficiency, solid value.
- Bifacial: can collect light from the back side—often better on reflective surfaces or ground mounts.
When panel efficiency matters: limited roof area, hot climates, or when you want the most kW in a small footprint.
Mounting & Racking
Racking holds your array in place and keeps the roof dry.
- Roof vs. ground mount: Roof is common and tidy. Ground mounts shine when you want perfect tilt, easy cleaning, or future expansion.
- Rails vs. rail-less: Rails simplify alignment; rail-less trims weight and parts.
- Weather loads: Proper attachments and flashing handle wind and snow. If you see water stains in your attic after installation, something’s wrong—speak up early.
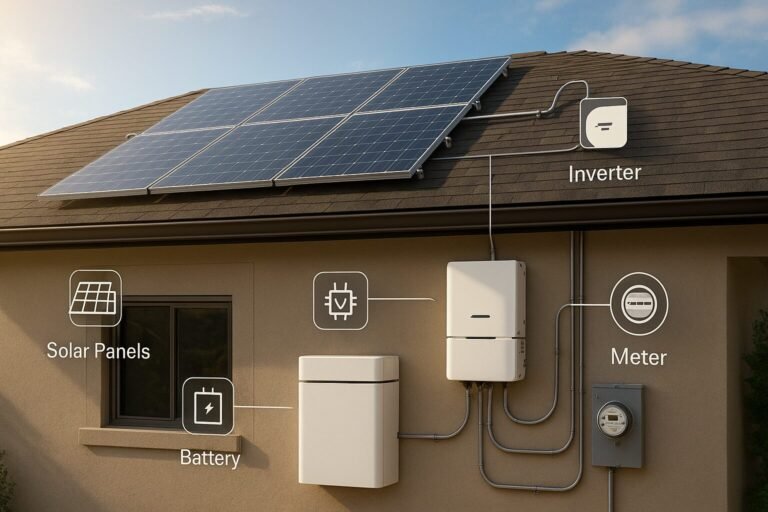
Balance of System (BOS) You Shouldn’t Ignore
BOS is the quiet hero—wiring, connectors, combiner boxes, disconnects, breakers, fuses, conduit, junction boxes, labels. It’s what inspectors examine first. Good BOS means clean wire runs, correct wire gauge, and overcurrent protection that matches your inverter and strings.
Skimmer cue: If the BOS is tidy, the install usually is too.
Inverters Explained (and Which One I Chose)
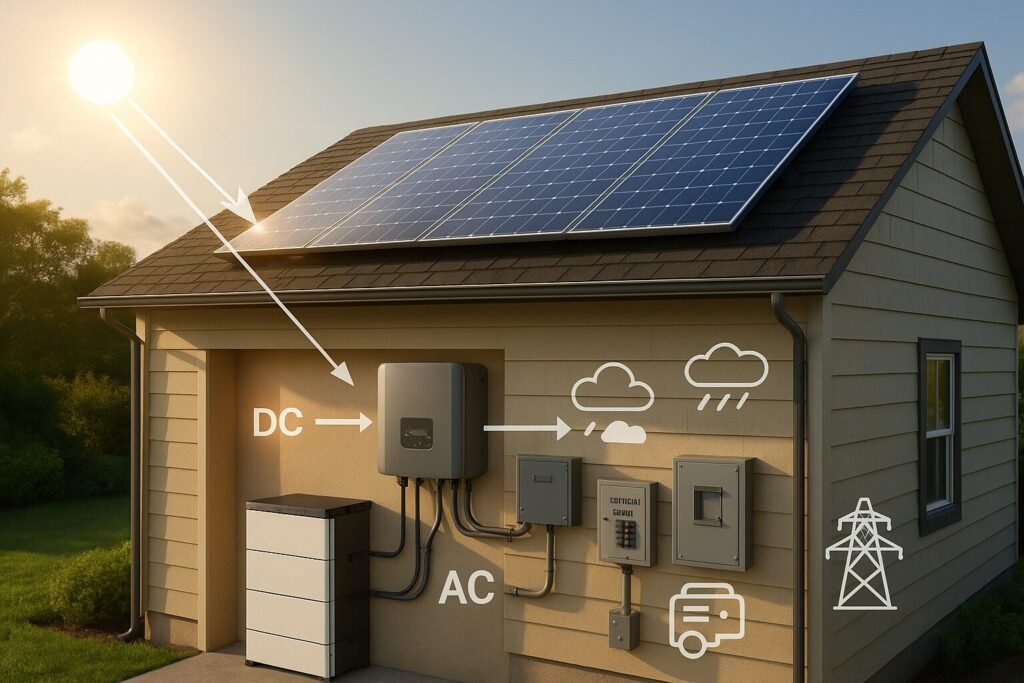
What an Inverter Does (Plain English)
Inverters turn the panels’ DC into AC that your home uses. They also manage safety features, talk to the grid, and feed your monitoring app. The inverter type you choose affects performance in shade, ease of expansion, and maintenance down the road.
String Inverters
- Pros: Simple, one central box, easy service access.
- Cons: One panel’s shade affects the whole string; single point of failure.
- Best for: Full-sun roofs with simple, unshaded planes.
Microinverters
- Pros: Panel-level conversion and optimization; great with partial shade and complex roofs.
- Cons: More devices on the roof; rooftop service can be trickier.
- Best for: Mixed shade, multiple roof planes, small add-on arrays.
DC Optimizers + Central Inverter
- Pros: Panel-level MPPT with a central “brain”; strong monitoring.
- Cons: You still have one central inverter to replace at the end of life.
- Best for: Moderate shade, owners who want detailed per-panel data.
Quick Pick Guide
Full sun & simple layout → String inverter
Mixed shade/complex roof → Microinverters
In-between & data-curious → DC optimizers
What I chose: I went with microinverters because I have a goofy roof with a couple of shade lines. The panel-level control gave me peace of mind and the monitoring graphs I live for.
Do You Need a Battery? (My Honest Take)
What a Battery Actually Does
A battery stores excess solar energy for later. It powers critical loads during outages and can shift usage to evenings if your utility has time-of-use rates.
Key specs:
- Usable capacity (kWh): how much energy you can actually use.
- Power (kW): how many appliances you can run at once.
- Round-trip efficiency & cycle life: how well it holds up.
Battery vs. Charge Controller vs. Hybrid Inverter
- Battery: the storage tank.
- Charge Controller: manages battery charging (often built into hybrid systems).
- Hybrid Inverter: one box that coordinates PV, battery, and grid/backup.
Should You Add One Now—or Later?
Use this quick decision tree:
- Frequent outages or sensitive equipment? → Lean yes.
- Time-of-use rates or demand charges? → Maybe, run the numbers.
- Simple net metering, stable grid? → Consider pre-wiring now, add later.
Pro tip: Even if you skip the battery, pick an inverter that’s battery-ready to avoid rip-and-replace later.
Safety & Code Bits That Keep You Out of Trouble
- Rapid shutdown: lets responders de-energize conductors quickly.
- Grounding/bonding: prevents shock hazards and stray currents.
- AFCI/GFCI: arc-fault and ground-fault protection reduce fire and shock risks.
- Disconnects & labeling: clear shutoffs for AC/DC; labels that match your single-line diagram.
- Correct wire gauge & overcurrent protection: sized for voltage drop and code.
If your installer speaks confidently about these and shows them on the plans, you’re in good hands.
Meters, Interconnection & Monitoring (Make It Visible)
Meters You’ll Hear About
- Net meter: tracks energy you push to and pull from the grid.
- Production meter: tracks solar generation only (useful for incentives).
- Smart meter: communicates with the utility for billing and grid management.
Monitoring Apps & Gateways
Look for:
- Per-panel or per-string data
- Alerting when production drops
- Exportable logs for warranty claims or energy nerding
Why it matters: Monitoring is your early-warning system. A dusty panel or tripped breaker stands out fast.
Step-By-Step: Matching Components to Your Home
- Roof & Site Snapshot
- Note orientation, tilt, and shade patterns. Count usable square feet.
- Bonus: take photos at 9am, noon, and 3pm to “see” shade movement.
- Target Output
- Pull 12 months of utility bills. Set a kWh/month goal.
- Convert to array size (kW DC) using local production estimates.
- Panel Pick
- If space is tight or hot, favor higher efficiency and better temp coefficient.
- Otherwise, focus on total kWh/year, not just the fanciest panel.
- Inverter Choice
- Use the Quick Pick Guide based on shade and roof complexity.
- Battery Plan
- Decide now vs. later. If later, make sure your inverter and wiring are battery-ready.
- Choose a whole-home or critical loads backup strategy.
- BOS & Safety
- Plan wire runs, combiner/disconnect locations, and labeling early.
- Confirm the rapid shutdown method with your installer.
- Monitoring
- Decide if you want per-panel visibility. It helps with troubleshooting and expansion.
- Future-Proofing
- Leave roof space and breaker capacity for an extra string or EV charger.
- Consider a conduit to a battery location or a future subpanel.
Print-and-Plan Checklist
Panels □ Inverter □ Battery plan □ Racking □ Wiring □ Combiner □ Disconnects □ Rapid shutdown □ Meters □ Monitoring □ Spare breaker □ Conduit path □
Common Mistakes I See (And How to Avoid Them)
- Picking panels before solving shade. Choose the inverter strategy first.
- Chasing efficiency over kWh/year. Design for energy, not just percent.
- Skipping rapid shutdown details. Ask “What’s our method?” and make sure it’s on the plans.
- No monitoring plan. You can’t fix what you can’t see.
- Zero expansion room. Leave the roof and electrical capacity for the future.
Mini-FAQ (Fast Answers)
What are the main components of a home solar PV system?
Panels, inverter (string/micro/optimizers), optional battery/hybrid inverter, racking, BOS wiring & safety, meters, and monitoring.
String vs. microinverters vs. optimizers—who wins?
It depends on shade and roof complexity. Full sun/simple → string. Mixed shade/complex → microinverters. In-between → optimizers.
Battery vs. charge controller vs. hybrid inverter—what’s the difference?
A battery stores energy. The charge controller manages charging. A hybrid inverter coordinates PV, battery, and grid/backup in one system.
My Shortlist of Specs That Actually Matter
- Panel: watts, efficiency, temperature coefficient, product/performance warranty terms.
- Inverter: max DC input, MPPT range, surge rating, communication/monitoring features.
- Battery: usable kWh, continuous/surge kW, round-trip efficiency, cycle life, warranty.
Practical Takeaways (Save or Screenshot)
- Pick the inverter around your shade and roof first.
- Size panels to your kWh goal and roof space.
- Choose battery-ready gear even if you aren’t buying a battery today.
- Insist on monitoring that you’ll actually use.
What I’d Do If I Were Starting Today
- Sunny, simple roof: high-watt mono panels + string inverter + pre-wire for battery.
- Mixed shade / many planes: microinverters or optimizers + clear monitoring.
- Backup-focused: hybrid inverter + battery now + critical loads subpanel.
Glossary (Plain-English)
- PV: photovoltaic—turns light into electricity.
- MPPT: maximum power point tracking—squeezes the most power out of panels.
- BOS: balance of system—everything besides panels and the inverter.
- Rapid shutdown: required method to quickly de-energize conductors on/near the array.
- Nameplate: rated output under test conditions.
- kW vs. kWh: kW is power (rate). kWh is energy (amount).
- Round-trip efficiency: how much energy returns after charging and discharging a battery.