Author Archives: Crazy Old Prepper

Federal & State Solar Tax Credits: Simple 2026 Guide

Last updated: January 2026 (rules change fast—bookmark this)

Big 2026 headline: the federal residential solar/battery credit (IRC §25D, claimed on Form 5695) was repealed for “expenditures made after December 31, 2025.” In plain English: if your solar or battery installation is completed in 2026, you generally don’t get the federal residential credit.
(You can still claim and carry forward unused credit for qualifying installs completed by 12/31/2025.)

State + utility incentives didn’t disappear—so in 2026 they matter more than ever.


TL;DR Snapshot (Skimmers, start here)

  • Homeowners (federal): The Residential Clean Energy Credit (§25D) is not available for expenditures made after Dec 31, 2025. If your install was completed by 12/31/2025, the credit rate was 30% and you claim it on IRS Form 5695.
  • Timing gotcha: Under §25D, an “expenditure” is treated as made when the original installation is completed—so a project started in 2025 but finished in 2026 generally won’t qualify.
  • Carryforward: If you qualified (installation completed by 12/31/2025) but didn’t use the full credit, you can carry it forward into future years (Form 5695 even has a “carryforward to 2026” line).
  • Businesses / landlords (federal): For projects placed in service after Dec. 31, 2024, the Clean Electricity Investment Credit (§48E) may apply (base 6%, increased up to 30% with prevailing wage/apprenticeship; plus possible adders). Claimed on Form 3468.
  • Batteries: Under the old residential rules, battery storage needed ≥ 3 kWh and was eligible (for qualifying installs through 2025).
  • Stacking incentives: Rebates and subsidies can affect what “costs count” for credits (and programs can have their own rules).
  • Best 2026 strategy for most homeowners: Focus on state + utility incentives and verify everything on DSIRE (state-by-state database).

Why this matters (my real-world take)

When I installed my first PV system, incentives were the difference between “maybe someday” and “let’s do this.” The tricky part wasn’t the gear—it was the paperwork and the timing.

In 2026, the game changed: the federal residential credit is gone for new installs, so your best savings now come from state, utility, and local programs (plus smart system design and financing).


1) Quick Definitions (No Jargon)

  • §25D (Residential Clean Energy Credit): The old federal homeowner credit you claimed on Form 5695repealed for expenditures made after 12/31/2025.
  • §48E (Clean Electricity Investment Credit): The current federal business/nonprofit investment credit for qualifying projects placed in service after 12/31/2024 (tech-neutral).
  • “Expenditures made” / “installation completed”: For §25D, the key timing concept is when original installation is completed.
  • Placed in service: Generally means installed and ready to operate (often aligned with inspection/interconnection approval in practice).
  • Rebate vs. tax credit: A rebate is cash back; a tax credit reduces tax you owe.

2) Federal Solar Incentives in 2026: What’s Still Available?

2.1 Homeowners (Primary/Second Homes)

For new 2026 installs: The federal residential credit does not apply if installation completes in 2026.

For installs completed by 12/31/2025:

  • Credit rate was 30% (for 2022–2025).
  • Claimed on Form 5695.

2.2 Businesses / Landlords / Some Third-Party Ownership (Still a Thing)

For projects placed in service after 12/31/2024, §48E may apply:

  • Base credit 6%, increased up to 30% for facilities meeting prevailing wage + apprenticeship rules, plus potential adders.
  • Claimed on Form 3468.
  • Direct pay or transfer may be available (and requires pre-filing registration).

Why you care as a homeowner: With a lease/PPA, the company owning the system may still qualify under business rules—and that can affect pricing. (You don’t claim the credit; they do.)


3) What Costs Count (If You’re Claiming a Credit for a 2025-Completed Install)

If your installation was completed by 12/31/2025 and you’re filing for it:

3.1 Typical Eligible Costs (Residential §25D rules through 2025)

  • Solar equipment that generates electricity for your home, plus labor allocable to onsite prep/assembly/original installation and required wiring.
  • Solar roofing tiles/shingles that function as both roof + solar collector can qualify; decking/rafters and purely structural roof components do not.
  • Battery storage had to be installed in connection with the home and be ≥ 3 kWh.

3.2 Rebates/Subsidies: The “Basis” Gotcha

For Form 5695 credit calculations, IRS instructions say you must subtract certain subsidies/rebates from qualified costs (examples include public utility rebates).

Skim-Stopper rule of thumb: If a program directly reduces what you paid, assume it can reduce what counts—until you confirm.


4) Timing Rules (This Is Where People Get Burned)

4.1 The 2026 Timing Trap

Because §25D is repealed for expenditures made after 12/31/2025, and because “expenditures made” generally means installation completed, a project that finishes in 2026 typically doesn’t qualify—even if you paid deposits in 2025.

4.2 What to Save

  • Final inspection sign-off / PTO letter
  • Itemized invoices + proof of payment
  • Permits + interconnection documents
  • Photos (labels/serials help)

5) How to Claim (If You’re Eligible)

5.1 Homeowners (Eligible 2025-Completed Installs)

  • Form 5695 → flows to Schedule 3 (Form 1040).
  • Form 5695 includes a line for carryforward to 2026 if your credit exceeds your tax liability.

5.2 Businesses / Landlords (2025+ Projects)

  • Form 3468 for §48E.
  • Basis reduction: Instructions for Form 3468 state you generally reduce the basis of energy property by 50% of the energy credit.

6) State + Utility Incentives (Your Main Savings Lever in 2026)

Since the federal homeowner credit is gone for new installs, your best play is to stack state + utility + local incentives.

6.1 The Fastest Way to Find What You Qualify For

Use DSIRE (Database of State Incentives for Renewables & Efficiency). It’s a long-running, state-by-state incentives database run by the NC Clean Energy Technology Center.

My workflow:

  1. Search DSIRE by ZIP/state
  2. Write down every program: rebates, tax credits, sales/property tax exemptions, battery incentives, net metering, grants
  3. Go to your utility’s site and confirm budgets, deadlines, waitlists, and required paperwork
  4. Apply early (many programs are “first come, first funded”)

6.2 Stacking Rules (Practical)

  • Usually you can combine programs, but each program may require you to apply in a certain order.
  • Keep a single spreadsheet with: program name, deadline, required docs, approval date, amount.

7) Batteries in 2026 (What to Know)

  • Residential federal battery credit: only relevant now if your battery installation was completed by 12/31/2025 (and met the ≥3 kWh rule).
  • State/utility battery programs: still common (especially for backup resiliency). Treat these like mini-grants with strict paperwork.

8) Common Pitfalls (2026 Edition)

  1. Installer says “30% federal credit” for a 2026 install → double-check. The IRS Form 5695 instructions say no residential clean energy credit for expenditures after 12/31/2025.
  2. Project crosses New Year: started in 2025, completed in 2026 → likely not eligible for §25D.
  3. Roof confusion: solar shingles may qualify; decking/rafters don’t.
  4. Missing paperwork: no itemized invoice, no final inspection/PTO, no proof of payment → headache later
  5. Not checking DSIRE + utility fine print: budgets, caps, waitlists, and pre-approvals are where savings go to die

9) Example Walkthroughs (Numbers You Can Copy)

A) Homeowner who completed install in 2025

  • Solar project cost: $22,000
  • Eligible credit rate (2022–2025 installs): 30%
  • Credit computed on Form 5695; unused amount can carry forward to 2026.

B) Business rooftop PV (placed in service after 12/31/2024)

  • Possible §48E credit: base 6%, can increase up to 30% + adders; filed on Form 3468.
  • Basis reduction rule applies.

C) 2026 homeowner install

  • Federal homeowner credit: generally not available
  • Your savings plan: state + utility rebates, tax credits, battery programs, net metering (start with DSIRE).

10) Your “Audit-Ready” Folder (Do This Once)

Use a simple naming pattern:
Solar_2025_Project/Invoices/
Solar_2025_Project/Permits_PTO/
Solar_2025_Project/Specs_Serials_Photos/

Keep it for years.


11) Pick Your Path (Internal Links)

  • New to solar? Read: Understanding Solar Power: A Beginner’s Guide to Self-Sufficient Living
  • Costs: How Much Do Solar Panels Cost in 2025
  • ROI: Are Solar Panels Worth It? ROI & Payback Period
  • Hardware: Solar Panel System Components Explained
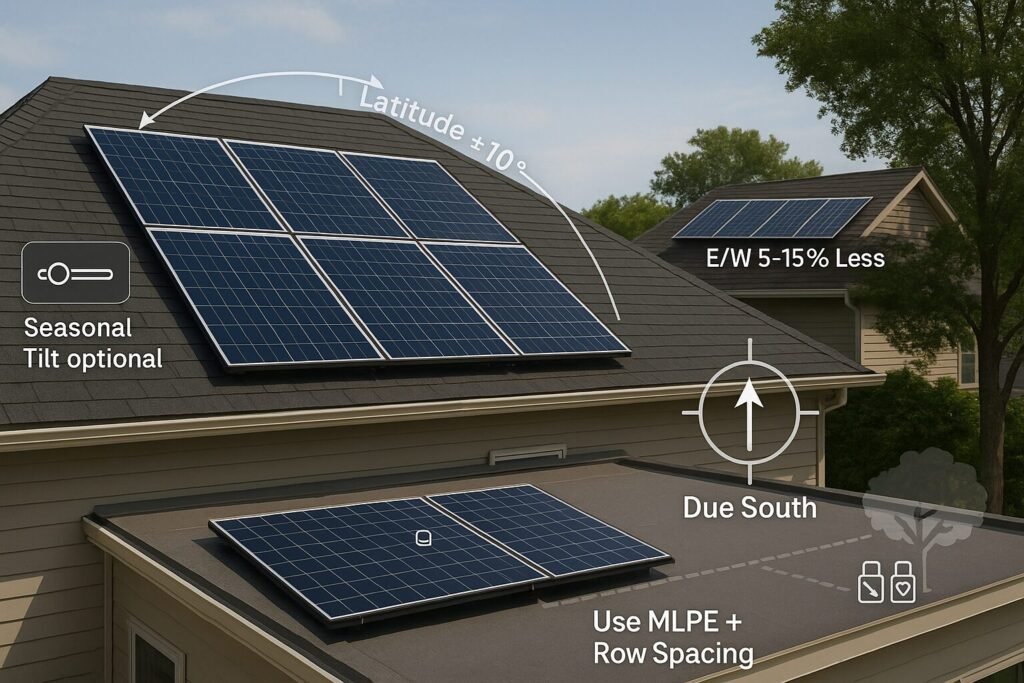
  • Placement: Optimal Angle & Placement for Solar Panels
  • Maintenance: Solar Panel Cleaning Guide

Practical Takeaways

  • If you completed installation by 12/31/2025: claim what you’re owed, and don’t forget carryforward if needed.
  • If you’re installing in 2026 as a homeowner: treat state + utility incentives as the main event (DSIRE first).
  • If it’s business/rental/third-party owned: model §48E carefully (labor rules, adders, Form 3468, basis reduction).

Friendly reminder: I’m not your CPA. Incentives are worth real money, and the details matter—so if you’re close to a deadline or have mixed-use/rental/business complexity, it’s worth a quick consult with a qualified tax pro.

Clean Solar Panels to Boost Solar Efficiency

Boost solar efficiency with safe, simple cleaning. Learn when to wash, what tools to use, and how to track gains—without risking your roof or warranty.

TL;DR Snapshot (Skim-Stopper)

  • Clean when data says so, not by calendar. Watch for a sustained 5–10% drop vs. your normal clear-day output.
  • Use soft tools + cool glass. Early morning, low-pressure water, microfiber/soft brush, DI/distilled water if you can.
  • No pressure washers. No harsh chemicals. No standing on panels.
  • Log everything. Date, method, “before/after” photos, and energy data.
  • Quarterly walk-around. Look for cracks, loose conduit, critter damage, corrosion, and clogged drains.
  • Low tilt, coastal, dusty sites = more frequent rinses.
  • Hire a pro if access is risky or grime is stubborn.

Why this matters (quick story)

When I installed my first small PV array, I assumed tropical rain would keep it spotless. It didn’t. Pollen baked on. Salt mist left mineral spots. Output dipped ~7% and stayed there. A simple early-morning rinse with deionized water and a squeegee brought production back the same day. Since then, I “clean by data,” not by habit—and I’ve kept a maintenance log that’s saved me time, money, and a warranty headache.


11 Common Questions—Answered with Clear, Do-Now Tips

1) How often should I clean my solar panels?

Start with monitoring, not a calendar. If your PV production drops ~5–10% vs. typical clear days (same season), it’s time. In dusty, coastal, or bird-heavy locations, expect light cleaning every 1–3 months. Elsewhere, 2–4 times a year works. After pollen bursts, wildfires, or storms, do a quick rinse.

Do this today: Open your monitoring app, note the average midday power on a clear day, and set a reminder to compare after the next rain or windy week.


2) Do rain showers clean panels well enough?

Rain is a rinse, not a wash. It often leaves hard-water spotting and can’t remove baked-on soiling like pollen, Sahara dust, or bird droppings. If your output is still depressed after rain, plan a proper wash and squeegee dry.


3) What’s the safest way to clean panels?

  • Time it right: Early morning or late evening—cool glass prevents thermal shock.
  • Tools: Telescoping pole + soft brush or microfiber pad, low-pressure hose.
  • Water: DI/distilled is ideal. If using tap water, rinse thoroughly and squeegee.
  • Avoid: Pressure washers, abrasive pads, scouring powders, ammonia/bleach/solvents.

Step-by-step (10 minutes):

  1. Hose a gentle sheet of water across modules.
  2. Lightly agitate with a soft brush (no heavy pressure on frames or junction boxes).
  3. Rinse from top down.
  4. Squeegee to prevent mineral deposits.
  5. Snap a quick photo for your log.

4) Which cleaning solution should I use?

Most of the time: just water. For stubborn grime, add a tiny drop of mild dish soap to a bucket (about 0.1–0.2%). Rinse completely. Don’t use glass polishes, abrasive compounds, or anything that can attack anti-reflective coatings or seals.


5) How do I remove bird droppings or tree sap?

Soak, don’t scrape. Lay a wet microfiber on the spot for 2–3 minutes to soften, then wipe gently. For sap, use warm soapy water and patience. If birds are chronic, consider mesh critter guards under the array and trim perches nearby.


6) Is climbing on the roof necessary—or safe?

Only with proper fall protection and a secure, walkable roof. Wet roofs are slippery. Never step on modules. If access is sketchy, use an extension pole from the ground or hire a pro.

Pro tip: If you must go up, plan a dry-footprint path, wear soft-soled shoes, and protect shingles/metal seams.


7) Could cleaning void my warranty?

It can—if you use the wrong methods. Check your module and racking manuals: water pressure limits, acceptable cleaners, temperature ranges, and no-touch zones. Keep a simple log (date, method, photos). It’s your best friend in a future warranty claim.


8) How do I know cleaning actually helped?

Compare apples to apples. Use similar-weather data: same time window near solar noon, similar temperature, no clouds. If you have panel-level monitoring (microinverters/optimizers), look for outliers—dirty modules rebound quickly.

Easy test: Record power at 12:30 pm the day before cleaning and the day after, both on clear days. Note the % change.


9) What regular maintenance should I do besides cleaning?

  • Quarterly: Visual check for cracked glass, delamination, hot spots/discoloration, loose conduit, chewed wires (hello, squirrels), corrosion on hardware.
  • Inverter check: Unusual fan noise or faults? Investigate.
  • Drainage: Clear leaves and debris near the array; ensure water can’t pool.
  • Electrical connections: Leave torque checks and DC work to licensed pros.

10) Do tilt and location change my cleaning plan?

Absolutely.

  • Low tilt (≤10°) or flat roofs: More soiling and water spots. Clean more often; squeegee every time.
  • Coastal sites: Salt spray → gentle rinses more frequently; add an annual corrosion inspection.
  • Arid/windy regions: Dust film after gusts; quick rinse restores long-term energy yield.
  • Under trees: Plan for pollen seasons and leaf litter.

11) When should I hire a professional?

  • Risky access or very steep pitches.
  • Stubborn contamination (cement dust, heavy sap, overspray).
  • Very low-tilt/flat commercial-style arrays.
  • Want a full system inspection (IR scan, torque checks, electrical tests).

What to ask for: Soft-brush methods, deionized water, proof of insurance, and before/after photos.


A Simple, Data-Driven Cleaning Plan (Buyers Love Clarity)

Monthly (1 minute):

  • Open your monitoring app and note midday power on a clear day.
  • If production is off by ~5–10%, schedule a wash.

Seasonal cadence (adapt to your climate):

  • Spring: Pollen rinse + quick inspection.
  • Summer: Dust or salt mist checks; spot-clean after windy weeks.
  • Fall: Remove leaves; check critter guards; confirm conduit is secure.
  • Winter: For snow, use a foam roof rake from the ground; never chip ice.

DIY Tools That Make It Easy

  • Telescoping water-fed pole with soft nylon/boar-hair brush
  • An inline DI canister or a jug of distilled water for the final rinse
  • Microfiber pads + squeegee
  • Gentle spray hose head
  • PPE: gloves, eye protection; fall-arrest gear if roof work is unavoidable
  • Phone/camera for log photos

(No need for fancy chemicals; technique beats products.)


Step-By-Step: My 15-Minute “Clean by Data” Routine

  1. Confirm the need: Quick look at last week’s production and today’s sky.
  2. Set up: Fill bucket (warm water), attach soft brush, grab squeegee.
  3. Rinse: Start top row to bottom with low-pressure water.
  4. Light scrub: Gentle passes; let water do most of the work.
  5. Final rinse: Prefer distilled/DI water.
  6. Squeegee dry: Prevent mineral spotting that hurts module efficiency.
  7. Log it: Two photos + note of time and any issues spotted.
  8. Verify: Check the output at the same time tomorrow. Note the % gain.

Troubleshooting Soiling & Output (Quick Reference)

  • Chalky film returns fast: You’re in a dusty/salty corridor → increase rinses; install critter mesh if pigeons are nesting.
  • One string lags: Look for a shaded or heavily soiled module; check optimizers/microinverters for errors.
  • Spots won’t lift: Pre-soak longer; avoid scraping; consider a pro clean.
  • Thermal shock worry: Never spray cold water onto hot glass at noon; stick to mornings/evenings.

Warranties, Manuals, and Safety (Don’t Skip)

  • Read your module manufacturer’s cleaning guidelines once. It takes five minutes and prevents costly mistakes.
  • Respect water pressure limits and temperature guidance.
  • Never open junction boxes or disconnect DC without training.
  • If something looks structurally wrong (loose rails, flashing issues), call a pro.

Fast ROI Check (Is Cleaning Worth It?)

If a careful wash restores ≥5% and takes you less than an hour, it’s almost always worth the water and time. If the gain is <2% and access is sketchy, stretch the interval or hire it out during your regular PV maintenance visit.


Internal Links (keep readers exploring)

Practical Takeaways

  • Clean, cool, clean, gentle, clean when data says so.
  • Document everything for warranty and for your own learning.
  • Match frequency to your site: low tilt, coastal air, or dust = more rinses.
  • Safety first. A modest output gain isn’t worth a risky climb.

Are Solar Panels Worth It? Payback & ROI Guide

See if solar pays off. Estimate payback from solar panel cost, rates, incentives, and net metering—plus when batteries help your ROI..

1) TL;DR Snapshot (for skimmers)

If your roof gets decent sun and you pay average-to-high electric rates, solar often pays for itself in 6–12 years, then keeps saving for decades. The biggest ROI swings are your utility rate, self-consumption vs export, installed cost, and incentives. Add batteries when you value backup or TOU bill control—not just for raw ROI. Get 2–3 quotes, run the simple payback math below, and sanity-check your numbers with your utility plan.

Quick hits

  • Worth it when: solid sun, fair pricing, usable incentives, good TOU match.
  • Slow payback when: heavy shade, very low usage, low export/buyback, costly re-roof needed now.
  • First step: pull 12 months of kWh and your current rate plan.

2) How to Calculate Your Payback (Step-by-Step)

I like simple math first, fancy modeling later. Here’s the exact walkthrough I used for my own home.

You’ll need

  • Last 12 months of usage (kWh) from your bill
  • Your current rate (¢/kWh) and rate plan (flat or TOU)
  • A system quote: size (kW DC) and total price
  • A quick production estimate (see PVWatts below)

Production estimate (fast & free):
Use NREL PVWatts to estimate kWh/year for your roof. Note azimuth (direction), tilt, shading, and a performance ratio (derate) roughly 0.80–0.90.

Payback formula (cash purchase):
Payback (years) = Net Upfront Cost ÷ Year-1 Bill Savings

ROI (lifetime, simple view):
ROI = (Lifetime Savings − Lifetime Costs) ÷ Net Upfront Cost

Worked example (swap your numbers):

  • System size: 7.0 kW
  • Gross price: $21,000 (example)
  • Federal tax credit (as of 2025, typically 30%): −$6,300
  • Net cost: $14,700
  • PVWatts production: 9,450 kWh/year
  • Your rate: $0.28/kWh
  • Year-1 savings: 9,450 × 0.28 = $2,646
  • Simple payback: $14,700 ÷ $2,646 ≈ 5.6 years

Reality check: TOU plans, export rates, and future rate changes will nudge this number. We’ll adjust for those next.


3) The Big ROI Levers (What Moves the Needle Most)

  • Electric rate & tariff: Higher ¢/kWh → faster payback. TOU can be a win if you use or export during peak times.
  • Usage & load timing: More self-consumption at peak value = bigger savings.
  • Sun hours/irradiance: Location + tilt/orientation + shade set your kWh/year.
  • Installed cost ($/W): Every $0.10/W shift can change payback by months.
  • System size: Right-sizing matters—oversizing into low export rates slows ROI.

Back-of-napkin sensitivities (same 7 kW, 9,450 kWh/yr):

Rate (¢/kWh)Year-1 SavingsPayback on $14.7k Net
$0.20$1,8907.8 yrs
$0.28$2,6465.6 yrs
$0.36$3,4024.3 yrs

4) Incentives: Tax Credits, Rebates, and How They Change Payback

  • Federal credit (residential clean energy credit): Often 30% of eligible costs (equipment + labor). Consult your tax pro.
  • State/utility rebates: These can stack and shorten payback further.
  • Where to check: DSIRE (U.S. incentive database)

Cost waterfall (example):
Gross $21,000 → State rebate −$1,000 → Federal credit −$6,000 = Net $14,000

Tip: Incentives can impact what’s considered “basis.” Read the fine print and keep every receipt.


5) Net Metering & Export/Buyback: Still Worth It?

Not all exported solar kWh are paid equally.

  • Full retail NEM: Exported kWh credited at your retail rate—great for payback.
  • Reduced export/buyback: Exports earn less than retail. Focus on self-use (run laundry/dishwasher mid-day, pre-cool home, charge EV).
  • TOU plans: Try to match your production with peak windows or store energy to discharge at peak.

Mini scenarios (very simplified):

  • Full NEM: You save close to retail for most kWh → fast payback.
  • Export < retail: Each exported kWh earns less → moderate payback.
  • Export caps: Size carefully and shift loads → still good if self-consumption stays high.

6) Cash vs Loan vs Lease/PPA: How Financing Reshapes ROI

Cash:

  • Fastest payback, highest NPV, no interest costs.
  • Best if you have the capital and plan to stay put.

Loan:

  • Compare the monthly payment vs the monthly bill savings.
  • Aim for positive cash flow in Year-1 or near break-even with strong long-term savings.
  • Watch interest rate, fees, and prepayment options.

Lease/PPA:

  • Low upfront. You “buy power,” not the system.
  • Often slower long-term value; can complicate home resale.
  • OK if cash is tight and you prioritize simplicity.

7) Batteries: When They Help (and When They Don’t)

I added storage mainly for peace of mind during outages—and to squeeze value from a TOU plan.

Economics to consider

  • TOU arbitrage: Charge from solar mid-day, discharge at peak.
  • Demand charges (rare for homes): Batteries can clip peaks.
  • Backup value: Hard to price, but real if you face frequent outages.
  • Incentives for storage: Some regions offer separate rebates—check DSIRE.

Sizing tip: Start with critical loads (fridge, lights, internet, a few outlets). Expand if economics or resilience needs justify it.

Example: If a battery lets you shift 6 kWh/day into a $0.25/kWh premium window, that’s ~$1.50/day or ~$45/month before losses—enough to change ROI for some homes, not for others.


8) Lifespans, Replacements, and O&M (Realistic Lifecycle)

  • Panels: Warranties often 25 years with ~0.3–0.7% annual degradation.
  • Inverters: String inverters commonly last 10–15 years; microinverters/optimizers may last longer—budget for a future replacement.
  • Batteries: Cycle-life driven; plan for replacement within the 10–15 year window depending on usage.
  • O&M: Occasional cleaning, monitoring alerts, maybe a service call.

Pro move: Build a 25-year schedule that includes an inverter swap and potential battery refresh so your ROI isn’t rosy by accident.


9) Electricity Price Growth (Inflation): What Should You Assume?

I run three cases for sanity: 0%, +2%, +4% per year. Don’t bank on aggressive escalation to “force” a payback.

Escalation25-yr Savings Impact
0%Conservative baseline
+2%Moderate boost
+4%Optimistic—use with caution

10) Site & Design: Roof, Tilt, Orientation, Shade, Location

  • Azimuth: South is best (N. Hemisphere), but SW/SE can be close.
  • Tilt: Match local latitude or your roof pitch; not perfect? It’s okay—production is resilient.
  • Shade: Trees, chimneys, neighbors—consider microinverters/optimizers to reduce mismatch losses.
  • Alternatives: Ground mounts or carports can beat a bad roof.
  • Regional irradiance: Your cousin in the desert will outproduce your coastal cottage.

Deep dive: Solar Panel EfficiencySolar Panel Placement Guide Do Solar Panels Work on Cloudy Days?


11) Home Value: Does It Move the ROI Needle?

Owned systems (not leased) generally help at resale when you can show:

  • Production history (download from your monitoring app)
  • Warranties & permits neatly filed
  • Utility bills before/after

Leased or PPA systems may require transfer paperwork. Neutral to positive, but disclose early.


12) Special Situations: Is Solar Worth It If…?

  • Low usage/vacation home: Consider a smaller array, aim for self-consumption, or explore community solar.
  • TOU plans: Great with daytime loads or a battery for peak shaving.
  • Condos/HOAs: Check roof rights; sometimes balcony PV or carport is allowed, or join community solar.
  • Off-grid: Different math altogether—include generator fuel, battery replacements, and higher maintenance.

Related reads:
Grid-Tied vs. Off-Grid Solar SystemsSolar System Components ExplainedHow Long Do Solar Panels Last?


13) Three Quick Personas (Mini-Models)

A) High bill, good roof, cash buyer

  • Expect short payback (often under 7 years).
  • Verdict: Go. Add battery only if TOU or outages justify it.

B) Average bill, loan, reduced export rate

  • Neutral to slightly positive monthly cash flow.
  • Verdict: Still good—shift loads to mid-day; consider a small battery later.

C) Low usage, shaded roof, curious about PPA

  • Savings are limited; export is low-value; shade hurts production.
  • Verdict: Pause. Fix shade, price a smaller array, or consider community solar.

14) DIY Your Numbers: Copy/Paste Worksheet

Fill this mini-table with your data:

InputYour Number
System Size (kW DC)
Gross Cost ($)
Incentives ($)
Net Cost ($)
Est. Annual Production (kWh/yr)
Rate (¢/kWh)
Year-1 Savings ($) = kWh × rate
Simple Payback (yrs) = Net ÷ Year-1 Savings

Tools I use:


15) Common Mistakes That Skew Payback

  • Overestimating production or future rate escalation
  • Forgetting inverter/battery replacements
  • Misreading TOU/export rules
  • Ignoring roof work or main panel upgrades
  • Oversizing into low export rates with little self-use

16) FAQ (quick answers, link to sections)

  • How accurate are online calculators? Good for ballparks—confirm with PVWatts and your exact rate plan.
  • What if I’ll move in 5–7 years? Factor in the home value bump and transferability.
  • Should I oversize for a future EV? Maybe. Add conduit now; expand later if export rates are weak.
  • Do I need permits and inspections? Yes—your installer or AHJ handles this; keep copies for resale.

17) Conclusion: A Simple Decision Flow

  1. Good sun + fair pricing + usable incentives? → Keep going.
  2. Rate plan fit (TOU/export) + self-consumption plan? → Strong case.
  3. Cash or affordable loan with realistic assumptions? → Numbers likely work.
  4. Battery: Add for TOU/backup; skip if pure ROI is your only goal.

Next steps today

  • Pull your 12-month kWh and rate
  • Run PVWatts for kWh/year
  • Get 2–3 quotes and fill the worksheet
  • Post your numbers in the comments—I’m happy to sanity-check.

🔶 Skim-Stopper Box: 3 Fastest Ways to Improve Payback

  • Shift loads to mid-day: laundry, dishwasher, EV charging.
  • Right-size the array: avoid low-value exports.
  • Stack incentives: claim federal credit and check local rebates.

✔️ Buyer Confidence Checklist

  • I’ve modeled Year-1 savings using my actual rate plan
  • I included inverter/battery replacements in the math
  • I confirmed incentives on DSIRE and kept all receipts
  • I have two quotes with apples-to-apples $/W and warranties
  • I understand my export or TOU rules

Helpful Internal Links

Helpful External Links


Final thought

I’ve made all the optimistic mistakes—overestimated the sun, ignored TOU quirks, forgot an inverter swap. The fix was simple: build a plain-English worksheet, pressure-test assumptions, and only then chase shiny extras like storage.

Solar Panel Cost 2026: Real Prices, Payback & Savings

2026 Update: 2025 Solar Costs Explained (and the fastest way to get your best quote)

I remember the first time I priced out solar for my little homestead project. I thought the “panel price” was the price. Nope. By 2025, what you actually pay is a mix of hardware, design, permits, labor, and (if you want backup) batteries—plus soft costs like sales commissions and financing fees.

Big 2026 update (don’t skip): the 30% Residential Clean Energy Credit (25D) for homeowner-owned solar/batteries was ended for installations completed after December 31, 2025. If your system was completed in 2025, you can still claim it on your 2025 tax return (filed in 2026). But if the install finished in 2026, you generally can’t claim 25D—even if you paid a deposit in 2025.


TL;DR Snapshot (for skimmers)

  • Typical 2025 installed price (before incentives): Many “normal roof + cash price” quotes landed roughly $2.4–$3.2 per watt (Wdc), with a national median around $2.50/W in late-2024 quote data and $2.48/W in early-2025 quote data.
  • What that means in dollars: A 10–12 kW system often pencils out around $24k–$38k before incentives (equipment + labor + permits + overhead).
  • Federal 30% credit (2026 reality check): 25D was ended for installs completed after 12/31/2025. If your system was completed in 2025, you can still claim it on your 2025 return using Form 5695, and unused amounts can carry forward (per the form).
  • Batteries (2025 pricing): Quoted storage pricing hit about $999 per kWh stored in late-2024 data; a common storage size was ~13.5 kWh.
  • Soft costs are the whole game: Panels can be a surprisingly small slice of the bill (EnergySage pegs panels at ~12% of total cost), so permits + sales + financing structure often decide whether you get a great deal or a “meh” one.

Skim-Stopper: Your 60-Second Cost Estimator

  1. Grab 12 months of bills and total your annual kWh.
  2. Quick sizing rule-of-thumb:
    • Annual kWh ÷ 1,300–1,500 ≈ system size in kW (lower number for northern/cloudier areas; higher for sunnier areas).
  3. Ballpark gross price:
    • kW × $2.4–$3.2/W × 1,000
  4. Sanity-check production with PVWatts (free).
  5. If your install was completed in 2025: estimate net cost at roughly ~70% of eligible costs (that was the 30% credit), then confirm on Form 5695 guidance.

1) 2025 Cost Basics: $/W and What It Looks Like by System Size

A lot of homeowners compare bids using gross $/W (Wdc). Marketplace data showed record-low median quoted prices around $2.50/W (late 2024), and around $2.48/W (early 2025).

Here’s a simple “most homes” table you can use for quick math (before incentives):

System sizeLow ($2.4/W)Mid ($2.8/W)High ($3.2/W)
4 kW$9,600$11,200$12,800
6 kW$14,400$16,800$19,200
8 kW$19,200$22,400$25,600
10 kW$24,000$28,000$32,000
12 kW$28,800$33,600$38,400

Reality check: price spreads are real. EnergySage found that a typical shopper could see thousands of dollars between their lowest and highest quote.

Why prices can still feel “high” even when panels got cheap

Wood Mackenzie noted module prices hit historic lows (roughly $0.07–$0.09/W) in 2024/early-2025—yet rooftop installs didn’t fall by the same amount because soft costs don’t shrink as fast.


2) The Federal 30% Credit (ITC/25D): What’s true in 2026

The part people miss:

  • If your solar/battery installation was completed after December 31, 2025: you generally can’t claim the Residential Clean Energy Credit (25D).
  • Deposits don’t save it: IRS guidance says if the installation is completed after 12/31/2025, you can’t claim the credit even if you paid before that date.
  • If your system was completed in 2025: claim it on your 2025 return using Form 5695 (filed in 2026). Any unused amount can carry forward per the form.

What costs counted (for 2025-completed installs)

Form 5695 instructions describe eligible costs including equipment plus labor tied to onsite prep/assembly/original installation and wiring/interconnection.

Important nuance: if you received a non-taxable utility subsidy/rebate, IRS instructions say you generally reduce your cost basis by that amount before calculating the credit.


3) Local Incentives + Net Metering / Buyback Rates: The real ROI lever

In 2026, local incentives matter even more because the homeowner-owned federal credit is gone for new installs.

My simple workflow:

  1. Check DSIRE for state/utility/local incentives.
  2. Pull your utility’s export / buyback rules (net metering vs net billing vs avoided-cost rates).
  3. Model your system with PVWatts and your actual bill structure.

Also: markets have moved toward lower export compensation (EnergySage calls out California’s Net Billing Tariff as a demand driver), which often increases the value of self-consumption (running loads midday) and sometimes batteries.


4) Batteries in 2025: how much they add (and how to decide without “vibes”)

EnergySage reported quoted storage prices around $999/kWh in late-2024 data, and a common battery size around 13.5 kWh—that’s roughly $13.5k for the storage portion at that benchmark (installed, with real-world variance).

Batteries usually pencil out best when:

  • You have frequent outages and real “value of backup”
  • You’re on TOU with big on-peak rates
  • Your utility pays low export rates, so storing solar is worth more than selling it

Battery reality check for 2026 installs: without the homeowner federal credit, batteries need a stronger “why” (backup/TOU/export limits) to justify the extra cost.


5) Payback & ROI: a simple way to think about it (2025 vs 2026)

A clean, practical framework:

Year-1 savings ≈
(kWh you don’t buy × retail rate) + (exported kWh × export rate)

Simple payback ≈
(net installed cost) ÷ (year-1 savings)

EnergySage’s marketplace data showed a median quoted payback period around ~7.1 years (late-2024).

What changes in 2026 for new installs?

If you’re comparing “same system, same savings,” losing a 30% credit means your payback can be roughly ~1.4× longer (because cost would be ~30% higher than the “credit net” scenario).

So a “7-year” payback environment can easily become ~10 years if nothing else changes—unless local incentives, installer pricing, or your rate structure makes up the gap.


6) Soft-Cost Tricks that actually work (aka: how to get a better quote)

These aren’t hacks—they’re the boring moves that force clean pricing and prevent surprise change orders.

A) Send installers an “apples-to-apples” spec sheet

Copy/paste this when requesting quotes:

  • Target system size: __ kWdc (or annual kWh offset target: __%)
  • Roof type + age: __ (and whether you plan to reroof within 5–7 years)
  • Inverter preference: string / micros / optimizer (or “bid both”)
  • Adders: battery yes/no; if yes, target usable kWh: __
  • Request: cash price + financed price, itemized
  • Confirm: includes permits, interconnection, monitoring, critter guard (if needed)
  • Include: panel/inverter/battery models + warranty terms + production estimate

B) Ask one question that exposes “dealer fee pain”

“What’s the cash price for this exact system, and what’s the total financed amount? What portion is financing/program fees?”

High dealer fees were called out as a major driver of inflated pricing in residential solar financing.

C) Reduce permit friction (yes, it can affect price)

Ask your installer whether your city/county uses SolarAPP+. NREL reports instant approvals and very fast issuance times where it’s adopted, which can reduce the “time carrying cost” installers bake into bids.

D) Kill the “surprise adders” before they appear

Have each installer explicitly answer:

  • Do I need a main panel upgrade or service upgrade?
  • Any roof work required (racking zones, setbacks, structural)?
  • Any trenching (ground mount, detached garage, long runs)?
  • Any insurance/engineering adders?

7) “What should I buy?” (equipment choices that move price the most)

  • String inverter: usually cheaper; best on simple, unshaded roofs
  • Microinverters/optimizers: cost more but can help on complex roofs/shade and give module-level monitoring
  • Ground mount: often higher cost (steel, footings, trenching), but great tilt/azimuth and easy access

8) Ongoing costs (owning the system)

Routine maintenance is usually small, but budget for:

  • Cleaning/visual checks (especially dusty/salty areas)
  • Inverter/battery replacement risk over long horizons
  • Optional monitoring subscriptions

NREL’s ATB notes residential PV fixed O&M can vary widely (they cite a range up to ~$40/kWdc-year).


Step-by-Step: Get Your Best Price in 5 Moves

  1. Total your last 12 months of kWh.
  2. Run PVWatts for your address and a realistic system size.
  3. Get 2–3 quotes using the same spec sheet (above).
  4. Verify local incentives on DSIRE + confirm your utility export rate.
  5. Choose the lowest lifetime cost offer with clear workmanship/warranty terms—not the prettiest monthly payment.

Quick FAQs (2026 edition)

Can I still get the 30% federal credit in 2026?
For homeowner-owned systems, IRS guidance tied to the One Big Beautiful Bill changes indicates you generally can’t claim 25D for installations completed after 12/31/2025.

What if I paid a deposit in 2025 but the install finished in 2026?
IRS FAQ guidance says you generally can’t claim the credit if the installation was completed after 12/31/2025, even if you paid before then.

How do I estimate production?
Use NREL’s PVWatts.


Suggested internal links (MicroHomesteader)

  • Solar Panel System Components Explained
  • How Solar Panels Work: A Simple Guide
  • Are Solar Panels Worth It? ROI & Payback Period
  • Solar Loan vs Lease vs PPA (2026 reality check)

What changed with solar tax credits (late 2025)

The Washington Post

Solar tax credits are ending. Here’s why that could be good for solar.

Sep 23, 2025

reuters.com

New US community solar fell by 36% in first half of 2025 after record year – Wood Mackenzie

Sep 30, 2025

ChatGPT can make mistakes. Check important info.

Solar Panel Efficiency: Real-World Factors & Easy Wins

Boost solar panel efficiency: cut heat, shade, and soiling, optimize tilt and MPPT, and use NOCT to set realistic output. Practical tips for real roofs.

TL;DR Snapshot (for Skimmers)

  • Heat, shade, and tilt/orientation are the biggest day-to-day efficiency killers.
  • Real-world output ≠ datasheet. Use NOCT and your performance ratio to set expectations.
  • Easy wins: improve convective cooling, reduce partial shading, clean on a smart cadence, and tune MPPT/inverter settings.
  • New to PV? Start with the basics: How Solar Panels Work: Simple Guide to Sun-Powered Energy.

The Day My “Perfect” Array Underperformed

I expected blue skies to deliver record watts. Instead, a warm June afternoon brought a dip right when the sun was brightest. A pencil-thin vent-pipe shadow slid across one module, and a layer of spring dust dulled the glass. That day taught me a simple truth: solar panel efficiency isn’t just about sunlight; it’s about managing lossesthermal derating, partial shading, and soiling.

If you’re just getting oriented, skim this primer first: The Basics of Solar Energy: From Sunlight to Electricity. Then come back here for practical fixes.


Skim-Stopper Box: Quick Actions to Boost Efficiency


1) Heat & the Temperature Coefficient: Why Hot Panels Make Less Power

My “best” summer day wasn’t best at all. At 2 p.m., output fell below 11 a.m.—on a cloudless day. The culprit was heat. PV cells are semiconductors; as cell temperature rises, voltage drops, so you see thermal derating.

What to know

  • The temperature coefficient (Pmax) (often −0.3% to −0.5%/°C) tells you how quickly power falls as modules heat.
  • NOCT estimates realistic outdoor cell temps. A hot, dark roof and tight standoffs raise backsheet temperature and depress performance ratio.

5-minute heat check

  1. Open your panel datasheet; note the Pmax temp coefficient.
  2. Estimate cell temp: ambient + 20–30 °C in full sun.
  3. Multiply °C rise by the coefficient to estimate power loss.
  4. If losses are big, increase standoff/air gap or consider a ground mount.

2) Shade & Obstructions: The Tiny Shadow That Breaks a String

I watched a narrow chimney shadow clip a single cell. The whole series string sagged. Bypass diodes helped, but module mismatch still hurts.

What to know

  • In series strings, even partial shading can bottleneck current and cause mismatch losses.
  • Common offenders: vent stacks, chimneys, dormers, antennas, and branches.
  • MLPEmicroinverters or DC optimizers—can salvage energy on shade-prone roofs. Learn how these fit into your system in Solar Panel System Components Explained (Easy Guide).

9/12/3 Shade Walk

  1. Check the array area at 9 a.m., 12 p.m., 3 p.m.
  2. Map moving shadow edges and note seasonal changes.
  3. Mark offenders and consider module relocation, careful trimming, or adding MLPE.

If shade is unavoidable, see Grid-Tied vs Off-Grid Solar: Which System Fits You? for setups that pair better with partial shade.


3) Orientation & Tilt: Set It (Mostly) and Forget It

My first roof forced an east–west layout. I expected disappointment, but discovered a benefit: gentler peaks and better morning/evening coverage for my loads.

What to know

  • Orientation: True south (N. hemisphere) or true north (S. hemisphere) maximizes annual plane-of-array irradiance.
  • Tilt: About latitude for all-year balance; flatter in summer, steeper in winter, if you can adjust.
  • East/west still performs well, shifting energy toward morning and evening.

Get angles and examples here: Orientation & Tilt Optimization. If you’re still planning the layout, pair it with the Placement Guide.


4) Weather: Clouds, Haze, Humidity, Snow, and Wind

My “worst” cloudy day surprised me. Peaks were lower, but diffuse irradiance kept production steady. Sometimes the cloud-edge effect even gave quick boosts.

What to know

  • Clouds: Lower irradiance, but not zero—diffuse light still makes power.
  • Haze/humidity: Scatters sunlight and trims insolation a bit.
  • Snow: Coverage blocks light; surrounding snow raises albedo, boosting output on clear days.
  • Wind: A free convective cooling fan that improves module efficiency.

Curious how weather interacts with storage during low-sun hours? Check Do Solar Panels Work at Night? Cloudy-Day Truths


5) Soiling: Dirt, Dust, Pollen, and Bird Droppings

Spring pollen humbled me. A gentle rinse brought production back and restored long-term energy yield.

What to know

  • Soiling losses vary by climate, tilt, and rain frequency.
  • Clean when output is ~5–10% below your clean baseline or after big dust/pollen events.
  • Lower tilts collect more grime; hydrophobic coatings and a decent self-cleaning tilt help.

Safe cleaning basics
See the step-by-step with gear and safety notes: Clean Solar Panels to Boost Solar Efficiency.


6) Panel Tech: Mono vs. Poly, PERC, TOPCon, HJT, Thin-Film

Upgrading a test array from older poly to modern mono PERC improved low-light starts and midday stability on my roof.

What to know

  • Mono PERC, TOPCon, HJT: Generally higher module efficiency with better passivation/structures; temperature coefficients vary by model.
  • Thin-film: Lower efficiency per area but often gentler temperature behavior—useful on hot, large surfaces with space.

7) Degradation & Warranties: Reading the Fine Print

I graphed annual output and saw a gentle slope—just what the performance warranty predicted.

What to know

  • Typical module degradation: ~0.25–0.6%/year depending on make/model.
  • After 25 years, many modules guarantee output retention around ~84–92%.
  • Two warranties: product (materials/workmanship) and performance (minimum output curve). Full walkthrough: How Long Do Solar Panels Last?.

8) Balance-of-System Losses: MPPT, Inverters, Wiring, Connectors

A friend’s array “underperformed” until we checked the inverter loading ratio—too much DC on too small an inverter, causing clipping at noon.

Where watts disappear

  • Inverter efficiency: Look at realistic CEC/Euro ratings.
  • MPPT efficiency: Good tracking helps under changing light/temperature.
  • Wiring: Excess voltage drop steals power—size conductors right.
  • Connectors/terminations: Resistance adds up; keep them clean and tight (per code).

9) Mounting & Ventilation: Give Panels Room to Breathe

I moved a test string from a dark, hot roof to an elevated ground rack. Same sun, cooler backsheet, better module efficiency.

What to know

  • Ground mounts or well-ventilated racks usually run cooler than tight flush roofs.
  • Maintain the recommended air gap to promote convective airflow.
  • Dark roofs and low standoffs trap heat and increase thermal derating.

10) Bifacial & Albedo: When the Back Side Helps

A carport with light gravel below outperformed a similar flush roof. The rear-side irradiance created a noticeable bifacial gain.

What to know

  • Best with elevated, open-back mounts and reflective ground (white membranes, light gravel, snow with high albedo).
  • On tight flush roofs, the back side often sees too little light to matter.

11) STC vs. NOCT (or PTC): Why Datasheet Watts Don’t Match Your Roof

My early forecasts were too rosy because I assumed STC. Real roofs live closer to NOCT.

What to know

  • STC: 1000 W/m² and 25 °C cell temperature—great for comparing models, not for forecasting.
  • NOCT/PTC: Closer to real outdoor conditions; add derating factors (temp, soiling, BOS) to estimate your performance ratio.
  • Want to estimate production? Use a calculator like NREL PVWatts.

Quick external resource: NREL PVWatts Calculator (estimate annual kWh with your tilt, azimuth, and location).


Field Test: A One-Hour DIY Site Audit

  1. Shade walk (9/12/3): Map moving shadows; photograph offenders.
  2. Tilt/azimuth check: Confirm orientation
  3. Ventilation scan: Measure standoff; look for blocked airflow.
  4. Soiling check: Compare today’s output to your clean baseline; schedule cleaning if ~5–10% down.
  5. Inverter logs: Look for clipping and MPPT oddities.
  6. Expectations: Re-forecast with NOCT and climate data.

Practical Conclusions & Takeaways

  • Focus on the controllables: shade, heat, airflow, cleanliness, and BOS tuning.
  • Track production and compare against NOCT-based expectations to monitor your performance ratio.
  • Make one change at a time so you know what actually helped your long-term energy yield.

FAQs (Quick Hits)

Do clouds kill production?
No. Diffuse irradiance still generates power—sometimes with quick cloud-edge boosts. See Cloudy Days & Nighttime Guide.

How often should I clean panels?
When output is ~5–10% below the clean baseline or after heavy pollen/dust. Step-by-step in the Cleaning Guide.

Is east/west worth it?
Often yes. You’ll shift energy to mornings/evenings—great for home loads. Read Orientation & Tilt.

Optimal Angle for Solar Panels: Quick, Proven Tips

Get the best tilt and azimuth for your latitude. See when east/west wins, fixed vs seasonal tilt, and easy shading fixes to boost real-world output.

Quick Story: My Roof Isn’t Perfect—Yours Doesn’t Have to Be

When I first checked my roof pitch and azimuth angle, I groaned. Not quite true south orientation, a chimney that creates partial shading, and a neighbor’s tree right in the sun path. I assumed my photovoltaic system would underperform. It didn’t. With a practical tilt angle near my latitude, smarter solar panel orientation for time-of-use rates, and a bit of shading analysis, my array delivers the energy yield I actually need.

TL;DR Snapshot (Skimmer Stopper)

  • Fixed tilt: Aim near your latitude (±10–15°) for the best angle for solar panels and strong annual production.
  • Optimal azimuth: Due south in the Northern Hemisphere (north in SH) typically maximizes solar energy output.
  • East/West facing solar panels: Often ~5–15% less than south but can save more with TOU pricing and evening loads.
  • Seasonal vs fixed tilt: Seasonal boosts are modest; set-and-forget works for most homes.
  • Shade mitigation: Prioritize clear sky; use microinverters or DC optimizers (MLPE) to reduce shading losses.
  • Row spacing: Use winter solstice sun angle to avoid inter-row shading.
  • Flat roof solar: Ballasted racking around 10–15°; mind wind uplift and leave service aisles.
  • Ground-mounted solar system: Exact tilt/azimuth, cooler modules, easier cleaning, and room to expand.

The “Right” Tilt: Simple Rules That Actually Work

Why latitude works: A tilt near your geographic latitude captures a balanced share of annual irradiance without fuss. Staying close protects your performance ratio and capacity factor.

Good-enough envelope: Latitude ±10–15° keeps PV performance healthy. Past that, little incident-angle gains are often overshadowed by orientation or shading issues.

Step-by-Step: Find Your Fixed Tilt

  1. Check latitude (maps or a solar angle calculator).
  2. Measure roof pitch (phone inclinometer is fine).
  3. Compare and decide: If you’re off by >15°, consider tilt adjustment via racking or a ground mount.
  4. Prioritize: Fix shade and azimuth first; tilt fine-tuning comes after.

Takeaway: A stable, near-latitude fixed-tilt array beats a fussy setup you’ll never adjust.


Is Due South Always Best? When SW/W or SE/E Can Win

True south (NH) / true north (SH) usually produces the most kWh per year. But your load profile and TOU windows might tell a different story.

  • Southwest/West orientation: Pushes power into late afternoon—great for TOU peak pricing or after-work self-consumption.
  • Southeast/East orientation: Strong morning production for early-bird homes.

How I Choose (Real-World)

  1. Open my utility’s time-of-use rate chart.
  2. Sketch our household load (cooking, laundry, AC, EV charging).
  3. If evenings are expensive, a west-facing solar layout often lowers bills even with slightly fewer kWh.

Takeaway: Don’t just chase kWh—chase the right kWh at the right time.


Seasonal Tilt vs Fixed Tilt: Worth the Ladder Trips?

Reality check: Adjustable tilt can nudge specific yield, but gains are usually modest for homeowners.

  • Winter tilt: latitude +10–15°
  • Summer tilt: latitude –10–15°

My approach: I run fixed-tilt near latitude and focus on module cleaning and shade mitigation to preserve solar panel efficiency.

Takeaway: For most homes, set-and-forget wins on simplicity and safety.


Racking Can Nudge Tilt—How Much, and Is It Worth It?

Typical adjustability: Many racking systems allow a few to ~15° of tilt adjustment.

Worth it when:

  • Roof pitch is far from the latitude.
  • You need better drainage on low-slope or flat roofs.
  • Snow shedding matters in winter.

Less value when: You already have fair tilt, clean optimal azimuth, and minimal shade. The marginal gain is small.

Takeaway: Fix orientation and shading before chasing small tilt gains.


East/West Roofs: How Much Do You Really Lose?

Rule of thumb: ~5–15% less annual solar panel output than south at the same tilt.

Why I still like E/W sometimes:

  • A flatter production curve that’s easy to self-consume.
  • West bias pairs well with battery storage for evening loads.
  • Can reduce inverter clipping at noon.

Offsets: If allowed, add a module, refine inverter sizing, or lean west to align with TOU peaks.

Takeaway: East/West isn’t “bad”—it’s often strategic.


What’s the Optimal Azimuth—And How Do I Measure It?

No special gear needed.

My Quick Method (Good Enough for Planning)

  1. Open a satellite map and align your roof edge.
  2. Use a compass app.
  3. Correct for magnetic declination to get true north.
  4. Read the azimuth angle (degrees from true north): 180° ≈ due south.

Accuracy within ±5–10° is fine for early solar panel placement decisions and PV design sketches.

Takeaway: Measure once; decide confidently.


Row Spacing & Self-Shading: Don’t Let Panels Shade Panels

For multi-row arrays (roof or ground), avoid row-to-row shading—especially at winter solar noon.

Quick Spacing Rule (Simple)

Minimum spacing between row fronts ≈ (rear-row height above front) ÷ tan(winter noon sun angle).

Plain English: Steeper tilts need more inter-row spacing. Tight site? Reduce tilt slightly or, on trackers, use backtracking.

DIY sanity check: I’ve used cardboard templates on a sunny winter day to visualize shadows—surprisingly effective.

Takeaway: A few inches on paper can be a lot of kWh in winter.


Trees, Chimneys, and Odd Shadows: Shade Happens—Plan for It

Prioritize clear sky windows at 9 am/noon / 3 pm. Those checkpoints catch most real-world shading issues.

Mitigation that works:

  • MLPE (microinverters or DC optimizers): Keeps one shaded module from dragging down the string; improves MPPT behavior.
  • Module placement: Avoid repeat offenders like flues and vents; reduce cell-level mismatch.
  • Targeted trimming: Small branches can reduce shading losses and hotspot risk.

Takeaway: Shade won’t be perfect. Your design can be.


Flat Roofs: Ballasted Tilt, Wind, and Layout That Works

Typical angle: 10–15° ballasted racking to improve drainage and boost solar panel efficiency.

Design notes I follow:

  • Respect edge and corner zones for wind uplift.
  • Maintain service aisles for cleaning and airflow (cooler modules = better performance).
  • Choose portrait vs landscape based on ballast needs and roof geometry.
  • Don’t crowd parapets; turbulence affects anchors and output.

Takeaway: Flat roofs are great for maintenance access and staged capacity additions.


Ground Mounts: Angle Freedom, Cooler Panels, Easier Cleaning

Why I love them:

  • Dial the exact optimal angle for solar panels and optimal azimuth for your site.
  • Better convective cooling improves module efficiency.
  • Cleaning is quick; expansion is easy.

Trade-offs: Trenching, yard space, fencing, and structures designed for local wind/snow loads.

Best when: The roof has poor orientation or chronic shade, or you may add a single-axis tracker later.

Takeaway: If the roof fights you, the ground often wins quietly.


Are Trackers Worth It at Home?

  • Single-axis tracker: Follows the sun east-to-west; boosts energy yield (especially afternoons) and uses backtracking to limit row shade.
  • Dual-axis tracker: Maximizes isolation capture, but adds cost and complexity.

Home reality: With unshaded space and high TOU prices, a single-axis on a ground mount can make sense. Otherwise, fixed-tilt near latitude is wonderfully simple.

Takeaway: Trackers are a situational upgrade, not a must-have.


Mini Planner: Quick Inputs, Quick Answers

Have ready: latitude, roof pitch, true azimuth, major shade sources, TOU schedule, and (optional) net metering rules.

  • Fixed tilt target:latitude
  • Okay range: latitude ±10–15°
  • Azimuth target: 180° (S) in NH, 0° (N) in SH
  • Row spacing: Clear winter noon shadows
  • Shading fix: Use MLPE where partial shading is unavoidable
  • Optional: Consider battery storage to shift solar into evening peaks

Takeaway: Five inputs → a confident first-pass layout.


My Practical Checklist (Print-Friendly)

  • Confirm latitude, roof pitch, and true azimuth
  • Map shade at 9 / 12 / 3
  • Choose: maximize kWh or optimize TOU bill
  • Pick fixed tilt (default) or seasonal tilt (only if you’ll adjust)
  • Select a string inverter or MLPE
  • Calculate row spacing for the winter solstice
  • If the roof is compromised, evaluate ground-mounted solar
  • Leave maintenance access; plan for soiling cleanup

FAQs (Short, Skimmable)

How much do I lose with east/west vs south?
Typically ~5–15% annually; west-facing solar can still save more with time-of-use peaks.

Is seasonal tilt a must?
No. Fixed-tilt solar panels near the latitude work well; seasonal tweaks give modest specific yield bumps.

Does exact tilt matter a lot?
Less than azimuth and shading. Fix those to protect the solar panel output.

Can racking fix a non-ideal pitch?
Often by a few to ~15°. Bigger shifts? Consider a ground-mounted solar system.


Clear Takeaways (For Buyers & Decision-Makers)

  • Unshaded sky + optimal azimuth beats micro-tilt perfection.
  • Match solar panel placement to TOU rates, load profile, and net metering rules.
  • Fixed tilt near latitude is efficient, low-maintenance, and reliable.
  • If the roof fights you, a ground mount (or single-axis tracker) can outperform.

Helpful Resources

Do Solar Panels Work at Night? Cloudy-Day Truths

Do solar panels work at night? Learn what happens on cloudy days, how batteries bridge the gap, and why design choices boost low-light output and backup.

My Rainy-Week Wake-Up Call

A few winters ago, we had five straight days of rain. I opened my solar app, saw a sad little production curve, and thought, “Uh oh—did something break?” It hadn’t. The system was fine. I just learned, the hard way, that solar isn’t about one perfect sunny hour. It’s about the total energy (kWh) you gather over many imperfect hours—clouds and all.

In this post, I’ll share what actually happens to solar panels in overcast weather and at night, how batteries bridge the gap, and how smart design (microinverters, layout, and settings) keeps your home comfortable year-round.

Skimmer Stop: TL;DR Snapshot

  • Cloudy ≠ zero. Expect ~10–60% of clear-sky output depending on how thick the clouds are.
  • Night = no PV. You’ll need the grid, a battery, or a generator.
  • Blackouts: Grid-tied solar shuts off for safety unless you have a battery/backup setup.
  • Design matters: Microinverters/optimizers + good layout = better low-light performance.

LSI sprinkles you’ll see naturally here: diffuse irradiance, low-light performance, partial shading losses, module mismatch, MLPE (module-level power electronics), capacity factor, winter insolation, time-of-use (TOU), depth of discharge (DoD), and round-trip efficiency.


Solar 101 in 90 Seconds

Solar panels turn photons into DC power, and your inverter converts that to AC for your home. On clear days, most light is direct. On cloudy days, much of it is diffuse irradiance—still useful, just weaker. That’s why you’ll see lower power (kW) at any moment on a gray day, but can still collect meaningful energy (kWh) across the whole day.

Glossary in Plain English

  • kW vs kWh: kW is “how fast right now,” kWh is “how much over time.”
  • Irradiance: sunlight intensity hitting the panels.
  • Production vs consumption: what your system makes vs what your home uses.

Cloudy vs. Sunny: How Much Power Do You Actually Get?

Here’s a practical rule of thumb I use when explaining low-light performance:

Cloud ConditionTypical % of Clear-Sky Output*
Light overcast / bright clouds~40–60%
Medium overcast~25–40%
Light overcast/bright clouds~10–25%
Broken clouds (“edge-of-cloud” lensing)Brief spikes possible

*These are ballpark ranges—your roof angle, temperature, panel type, and shading all nudge the numbers.

Key idea: It’s the total kWh that matters. A cloudy day may look weak at noon, but it can still add up if you gather energy slowly all day.

Skimmer Box – One Number to Remember:
Plan on ~25–60% of sunny-day output across typical cloudy days.


Nighttime Reality Check: Moonlight, Streetlights & Myths

This one’s simple: panels don’t produce meaningful electricity at night. Moonlight and streetlights are far too dim to register useful output. At night, you’re powered by the grid, a home battery, or a generator—not your PV array.


Will I Have Power in a Blackout if It’s Cloudy or Night?

  • Grid-tied only: No. Your inverter shuts down during outages to protect lineworkers.
  • Grid-tied + battery (hybrid): Yes, if you have a backup loads panel and the system is configured for islanding. You can ride through clouds and nights using stored energy.
  • Off-grid: Your battery covers loads; if the weather is rough for days, a generator tops you off.

Skimmer Tip: Ask your installer about a critical/backup loads panel and how long it will run your essentials.


Batteries 101: Bridging Nighttime and Low-Sun Hours

Batteries shift energy from when you have it (daytime) to when you need it (evening/night). Here’s a quick sizing walkthrough I use with friends:

  1. List your critical loads. Fridge, Wi-Fi, a few lights, device charging, maybe a bedroom outlet.
  2. Estimate daily energy for those loads (kWh). Your fridge might be ~1–2 kWh/day; lights and Wi-Fi are small.
  3. Pick autonomy. How many hours (or days) do you want to cover?
  4. Adjust for battery rules. Consider DoD (how much you can safely use) and round-trip efficiency (charge/discharge losses).
  5. Reality check. What’s your peak power draw? Make sure the inverter/ESS can deliver that momentary wattage.

Example: If essentials need ~4 kWh overnight and your battery allows 90% usable with ~90% round-trip, target ~5 kWh of nominal capacity to cover a typical night with a bit of cushion. Whole-home backup often needs more—sometimes much more—especially for cooking, AC, or pumps.

Quick Chemistry Note: LFP (lithium iron phosphate) usually offers great cycle life and stable performance, which many homeowners prefer for daily load shifting.


Do Some Panels Do Better in Low Light? (Mono vs. Poly vs. Thin-Film)

  • Monocrystalline (PERC/TOPCon): High efficiency and strong all-around performance; commonly used on homes.
  • Polycrystalline: Slightly lower efficiency; similar real-world behavior in many cases.
  • Thin-film: Often better relative low-irradiance response and high-temperature tolerance, but lower power density per square foot. Useful for tricky roofs or partial shade.

Skimmer Box – What Matters Most:
Panel choice helps, but layout, tilt, and electronics (MLPE) often move the needle more for cloudy-day and partial-shade performance.


Shade & Strings: Does One Cloud or Chimney Kill the Whole Array?

With a traditional string inverter, one shaded module can drag down its whole string (module mismatch). That’s why layout matters—avoid chimneys, vents, or trees shading the same string during key hours.

MLPE to the rescue: Microinverters and DC optimizers give per-module MPPT, so one shaded module doesn’t kneecap the others. Add built-in bypass diodes in panels, and you’ve got multiple layers of insurance against partial shading losses.


Microinverters & Power Optimizers on Cloudy Days

Cloudy conditions create uneven patches of light. Microinverters/optimizers let each panel find its own “best point,” squeezing more energy out of diffuse irradiance. You also get granular monitoring, so you can spot a single panel underperforming and fix it.

When is a string inverter still great? Simple, shade-free roofs with clean south-facing planes. Fewer parts, clean look, highly efficient. Right tool, right job.


Right-Sizing in Cloudy Climates (and Winter)

A practical framework I use:

  1. Check your local solar resource (annual kWh/kW).
  2. Design for winter baseline if reliability matters. Shorter days and low sun angles reduce production.
  3. Consider tilt. A slightly steeper tilt can help winter insulation and snow shed in cold climates.
  4. Add a modest battery buffer if your area sees frequent storms or outages.
  5. Plan your loads. Shift laundry, dishwashing, and EV charging to daylight or off-peak windows.

Skimmer Tip: If winter reliability is a goal, size for your lowest-sun month, not your best month.


Seasons, Latitude, and Shorter Winter Days

  • Shorter days + lower sun mean fewer kWh in winter.
  • Cold helps efficiency. Panels like cool temperatures.
  • Snow: Can block panels, but surrounding snow can boost light via albedo when panels are clear.
  • Simple winter mode: Keep modules clean, trim branches, adjust tilt if you have an adjustable rack, and shift flexible loads to the brightest hours.

Net Metering & Time-of-Use (TOU): Offsetting Nights and Storms

If your utility offers net metering or export credits, daytime surplus can offset nighttime imports on your bill. With TOU rates, a battery can charge from midday solar and discharge during peak pricing, which improves savings even on partly cloudy weeks.

What to check on your bill or utility portal

  • Export rate vs retail rate
  • Peak / off-peak windows
  • Any demand charges or fixed fees
  • Battery program incentives (some utilities pay for peak-shaving help)

Maintenance & Monitoring to Max Out Low-Light Output

  • Keep panels clean. Dust, pollen, salt spray, and leaf litter all reduce irradiance.
  • Watch “shading creep.” Trees grow; revisit trimming every year or two.
  • Update firmware. Inverter/ESS updates improve reliability and sometimes performance.
  • Use your app. A quick monthly glance catches issues early (string down, optimizer offline, etc.).

Quick Maintenance Checklist

  • Monthly: open app, compare to last year’s same month
  • Quarterly: ground-level visual scan; look for debris or unusual shading
  • Annually: trim trees; inspect roof attachments; review production vs expectations

Step-by-Step: Build Your “Cloud & Night” Plan (5 Easy Steps)

  1. Pull 12 months of usage from your utility (kWh and your peak month).
  2. List critical loads and choose target backup hours/days (autonomy).
  3. Pick electronics: string inverter for clean, shade-free roofs; microinverters/optimizers (MLPE) for complex or partially shaded roofs.
  4. Size the battery for your evening peak + overnight, factoring DoD and round-trip efficiency.
  5. Dial in utility settings: confirm TOU windows and net-metering rules; set your battery’s charge/discharge profile to match.

Buyer Clarity: Questions to Ask an Installer

  • “How will partial shading affect my array, and how are you mitigating it?”
  • “String vs microinverters/optimizers—why is your pick best for my roof?”
  • “What’s my expected winter production and backup runtime?”
  • “How is the critical loads panel configured?”
  • “What monitoring data will I have, and what’s the support process if a panel underperforms?”

Common Myths, Busted

  • “Solar doesn’t work in cloudy places.” It does—reduced, not zero.
  • “Panels make power from moonlight.” Nope.
  • “Grid-tied systems run during outages.” Not without a battery/backup configuration.

Conclusion: Practical Takeaways

Clouds slow you down, but they don’t stop you. Nights require storage or the grid—that’s normal. The big wins come from smart design, right-sizing, and simple maintenance. If you approach solar as a daily and seasonal energy plan—not a noon snapshot—you’ll feel confident no matter what the sky is doing.


Quick Reference Tables & Mini-Calculator

Clouds vs Output (Handy Table)
Already above—copy into a callout box in your editor.

Inverter Type Cheat Sheet

ScenarioBest FitWhy
Clean, shade-free planeString inverterSimple, efficient, fewer parts
Complex roof or partial shadeMicroinverters/Optimizers (MLPE)Per-module MPPT, better mismatch handling
Desire per-panel monitoringMLPEGranular visibility/troubleshooting

Battery Mini-Calculator (back-of-napkin)
Battery size (kWh) ≈ (Nighttime essential kWh) ÷ (DoD × round-trip efficiency)

Example: 4 kWh ÷ (0.9 × 0.9) ≈ 4.94 kWh


FAQ (Reader-Friendly)

  • How much do panels produce on overcast days? Often ~10–60% of clear-sky output, depending on cloud thickness.
  • Do panels work from moonlight or streetlights? No—too dim to matter.
  • Will I have power in a blackout? Only if you have a battery/backup setup.
  • How do batteries help at night? They store daytime solar and release it after sunset.
  • Which panels are best in low light? Mono is strong all-around; thin-film can excel relatively in diffuse light but needs more area.
  • What about partial shade? Use MLPE and smart layout to minimize losses.
  • How do seasons and latitude matter? Winter means less sun; design for your lowest-sun month if reliability is key.
  • Can net metering/TOU offset nights and bad weather? Often, yes—day exports can offset night imports, and batteries help with peak pricing.
  • What simple maintenance helps? Keep panels clear, trim trees, update firmware, and watch your app for alerts.

Internal Links

How Long Do Solar Panels Last? Lifespan & Warranties

How long do solar panels last? See real-world lifespan, typical degradation, and warranty tips—plus simple maintenance to keep output strong for decades.

Are my panels halfway done… or just getting warmed up?

The moment I realized my array wasn’t “getting old,” just settling in, I was standing on the driveway with a hose, rinsing off spring pollen. My monitoring app said year eight, month three. Production was a touch lower than year one, but not collapsing—more like a favorite backpack that’s softened with use. That’s the truth about solar panel lifespan: they rarely die dramatically. They fade slowly.

In this guide, I’ll walk you through how long panels really last in the real world, what product vs. performance warranties mean (without legalese), how degradation works, and what simple maintenance keeps your system healthy for decades. I’ll also cover what shortens lifespan, how inverters and batteries compare, what’s actually covered, and when it makes sense to replace panels vs. keep them running.

If you’re skimming, keep an eye out for the “snapshot” boxes and checklists. If you want to go deep, I’ve included step-by-step actions you can take today.


TL;DR snapshot (for skimmers)

  • Typical service life: 25–35+ years in real homes.
  • Annual degradation: ~0.3%–0.8% per year after the first year.
  • Year-25 output: commonly ~80–92% of original power.
  • Two warranties to know:
    • Product (materials/workmanship): protects against defects and failures.
    • Performance (power output): guarantees you’ll retain a minimum % of rated power over time.
  • Longevity boosters: clean when visibly dirty, keep wiring tidy, monitor for shading or faults.

1) Real-world lifespan: what “25 years” actually means

“25 years” is a milestone, not an expiration date. It’s the point many manufacturers use for performance guarantees. Most panels continue working past that—just a little weaker each year.

Why lifespan varies

  • Climate: Hot rooftops accelerate aging; cool and breezy sites age more slowly.
  • Installation quality: Proper racking, secure wiring, and good airflow behind panels reduce stress.
  • Panel construction: Glass/glass and robust backsheets tend to resist moisture and UV better over time.

Plain-English takeaway: Think of panels as marathoners. They don’t sprint, they just keep clocking miles—slightly slower each lap.

Quick tip: Past 25 years, many arrays still produce meaningful energy. The decision to replace is usually economic, not because the panels “quit.”


2) Product vs. performance warranties (and why both matter)

You’ll see two promises on almost every spec sheet:

  • Product warranty (materials/workmanship): Covers manufacturing defects—things like glass lamination issues, junction box failures, or abnormal hot spots. If the panel fails because it was made wrong, this is the umbrella.
  • Performance warranty (power output): Guarantees the panel will still deliver at least a specified percentage of its original rated power for certain years (often a slightly bigger drop in year 1, then a tiny step down each year).

How I read them quickly:

  1. Confirm product warranty length (often 10–25 years).
  2. Check the year-25 performance guarantee (e.g., 84–92% is common).
  3. Note any requirements (registration, installer certification, time limits to file claims).

Mini-checklist (save this during install):

  • Photos of each panel’s label with serial number
  • Panel layout map (string map if applicable)
  • Invoices and interconnection approval
  • PDF copies of warranties

3) Degradation rates: how much output after 25 years?

Panels typically lose a small chunk in year one, then settle into a slow, steady fade. A common long-term range is ~0.3–0.8% per year after year one, depending on module type, climate, and care.

Quick expectation guide (approximate retention of original power):

YearExpected Output
10~92–97%
15~88–95%
20~84–93%
25~80–92%

These aren’t cliff drops. They’re gentle slopes. That’s why many systems remain useful long after the warranty.

Quick tip: When you compare panel longevity, watch for terms like module degradation, output retention, and long-term energy yield. They’ll help you judge how your system ages in real conditions.


4) What shortens panel lifespan?

Heat
High cell temperatures speed up chemical aging. Panels need airflow. A little standoff from the roof helps.

Weather & impacts
Hail, wind uplift, and heavy snow loads stress glass and frames. Proper racking, correct torque, and rated fasteners keep things tight.

Salt mist & corrosion
Coastal air can corrode frames and contacts. Panels with salt-mist certifications and stainless hardware hold up better near the ocean.

Shading & soiling
Leaves, bird nests, pollen, and dust cause micro-hot spots and trigger bypass diodes—reducing output and aging the module unevenly.

Electrical stress
Mismatched strings, non-listed connectors, or sloppy terminations create resistance and heat. Use the listed parts and correct polarity every time.

Good-Better-Best airflow note:
Good: standard roof standoffs.
Better: optimized racking with clear rear ventilation.
Best: cool roof + unobstructed rear airflow.


5) Do premium brands last longer—or just promise more?

Premium panels often feature stronger frames, UV-resistant backsheets, and sometimes glass/glass construction. They also may undergo extended stress tests (thermal cycling, damp heat) and carry longer product warranties. That said, brand premium doesn’t guarantee miracle longevity; it often buys confidence: better track record, easier claims, stronger bankability.

Practical tip: Compare the product warranty and the year-25 performance %—then look at independent reliability testing summaries if available. You’ll see who backs their panels with more than marketing.


6) Warranty gotchas: easy ways to void your coverage

  • Unapproved roof work near the array that disturbs mounts or wiring.
  • DIY electrical changes (non-listed connectors, splicing leads, mixing brands).
  • Relocating panels without following the manufacturer’s process or removing serial labels.
  • Skipping required maintenance or failing to document issues.

Step-by-step: how I keep claim-ready records

  1. Keep a cloud folder with invoices, serial photos, and permit/utility approvals.
  2. Take dated photos after installation and each year.
  3. Log any service visits and production dips with brief notes.

7) Are warranties transferable when you sell the house?

Many are, but with rules: a time window to submit transfer paperwork, proof of purchase, and sometimes a one-time transfer limit. If you’re selling, put all documentation in a neat digital packet for the buyer—warranty PDFs, serial numbers, and a brief “system summary” page. It signals care and can support your home’s value.


8) What’s covered (and not): parts, labor, removal/reinstall

  • Product defects: Often, panel replacement or repair is covered.
  • Performance shortfalls: Remedies can include extra panels, replacements, or compensation—details vary.
  • Labor & logistics: Shipping, lift rental, roof work, or removal/reinstall may or may not be covered.
  • Exclusions to watch: Storm or impact damage, third-party wiring, and acts of nature not explicitly included.

Buyer clarity: Read the “remedy” language, not just the headline years.


9) Inverters & batteries: different clocks, different warranties

Your panels may run for three decades, but other components have shorter cycles.

  • String/hybrid inverters: Typically 10–12 years standard, with optional extensions.
  • Microinverters/optimizers: Commonly 20–25 years, closer to panel timelines.
  • Batteries: Warranty blends cycle life and calendar life with throughput limits; temperature management is key.

Planning tip: Put reminder notes for the inverter warranty year and the likely replacement window. It prevents surprises in year 11.


10) Maintenance to reach full lifespan

You don’t need to baby panels, but you shouldn’t ignore them either.

Simple routine

  1. Seasonal glance: Look for cracked glass, discoloration, critter nests, or loose conduit.
  2. Clean when needed: If you see grime or notice a persistent production dip, rinse with gentle water and a soft brush if necessary.
  3. App check (monthly): Scan for unusual drops in one string or module.

Annual checklist

  • Take fresh photos of each array section.
  • Inspect frames, backsheets (where visible), and wire management.
  • Verify roof penetrations and flashing look sound.
  • Note anything odd in your monitoring graphs.

Quick tip: For troubleshooting and upkeep, useful search terms include preventive maintenance, performance monitoring, thermography, and fault detection. They’ll help you find guides and spot issues early.


11) Replace or keep running? Recycling & disposal basics

Keep running if: production is steady, no physical damage, and economics favor staying the course.
Consider replace/repower if: cracked glass, severe delamination, recurring ground faults, or output that’s dropped well below expectations.

Second-life & recycling

  • Second-life uses: Sheds, off-grid cabins, low-demand loads.
  • Certified recycling: Look for regional programs that recover glass, aluminum, and silicon.
  • Transport tips: Wear gloves, protect edges and glass, and secure panels to avoid flexing.

12) Step-by-step: your personal “warranty & health check” (printable)

  1. Gather docs: serial photos, invoices, warranty PDFs, and interconnection letter.
  2. Pull data: export the last 12 months of production; note seasonal patterns.
  3. Inspect & photograph: glass, frames, wiring, roof flashing, critter guards.
  4. Compare to expected: adjust for season, tilt, shade.
  5. If off-track: contact installer/manufacturer before DIY fixes to preserve coverage.

13) Quick FAQs

Do panels work after 25 years?
Usually, yes—just at a lower output. Many arrays are useful well beyond their warranty.

How much cleaning is enough?
When visibly dirty or when monitoring shows a persistent drop versus historical norms for that season.

Will Hail void my warranty?
Depends on the panel’s impact rating and the warranty’s exclusions. Weather damage isn’t always covered.

Can I add new panels later?
Often yes, but check inverter capacity, code requirements, and whether mixing models affects performance.


Conclusion: My takeaways after years with solar

Solar panels are long-game machines. Treat them kindly, keep basic records, and they’ll give you decades of clean power. Read both the product and performance warranties, do a quick seasonal check, and you’ll likely see your system quietly humming along long after the 25-year mark.

Internal Links

Grid-Tied vs Off-Grid Solar: Which System Fits You?

Clear guide to grid-tied vs off-grid solar—costs, batteries, blackout backup, incentives, and sizing—so you can choose the best system for your home.

Quick Story: The Day I Learned Panels Alone Don’t Keep Lights On

When I installed my first small array, I pictured the lights glowing through any storm. Then the grid went down. My panels were sunlit, but my home went dark. That’s when I learned the hard truth: a standard grid-tied system shuts off during blackouts for line-worker safety. Since then, I’ve helped friends choose between grid-tied, off-grid, and hybrid setups—without the confusion or disappointment I felt that day. This post is the guide I wish I had.


TL;DR (30 Seconds)

Choose grid-tied if:

-You want the simplest system, strong incentives, and the lowest cost per kWh—blackout power requires extra gear.
-You have no utility or want full independence—plan carefully for batteries, winter sun, and generator backup.
-You want grid savings and backup for key circuits during outages.


Snapshot Comparison (Skimmer-Friendly)

FeatureGrid-TiedOff-GridHybrid (Grid + Batteries)
Primary GoalLower bills via net metering/buybackFull independenceSave on bills + keep essentials on
Blackout BehaviorShuts off (no power)Runs from batteries/generatorKeeps backed-up circuits on
Battery Required?NoYesOptional (for backup/self-use)
ComplexityLowHighMedium–High
MaintenanceLowHighest (batteries/generator)Medium (battery care)
Permits/InterconnectionUtility + AHJAHJ only (no utility)Utility + AHJ
Good Fit ForReliable grid, strong incentivesRemote sites, independenceOutage-prone areas, WFH, medical needs

AHJ = Authority Having Jurisdiction (your local permitting office).


How Each System Actually Works (Plain-English)

Grid-Tied

Panels feed a grid-tied inverter that synchronizes with the utility. Your home uses solar first; extra flows to the grid for credits or buyback. For safety, it must shut down during an outage (anti-islanding).

Off-Grid

Panels feed a charge controller that charges a battery bank. An inverter draws from the batteries to power your home. No utility connection. Most off-grid homes include a generator to cover long cloudy stretches or winter.

Hybrid

A grid-tied system with a battery-capable (“hybrid”) inverter. When the grid is up, you save on bills; when it’s down, a critical-loads subpanel stays alive from your batteries (and optionally, a generator).


Blackouts & Backup: What Really Happens

  • Why grid-tied shuts off: anti-islanding protects utility crews working on lines.
  • How to keep power on: use a hybrid inverter and wire a critical-loads subpanel (fridge, lights, internet, a few outlets). Whole-home backup is possible with larger inverters and bigger batteries, but it raises complexity.
  • My backup list: modem/router, a few LED circuits, fridge/freezer, and a small workstation. It’s amazing how livable a home feels with just those.

Costs: Upfront vs. Lifetime (What Really Drives Them)

  • Upfront drivers: batteries, inverter type (string, micro, hybrid), balance of system (racking, wiring, breakers), engineering, permits.
  • Lifetime drivers: battery replacement cycles, inverter replacements, generator fuel/maintenance (off-grid), utility rate changes (TOU), and your ability to self-consume more of your solar.
  • A useful lens: the value of lost load (what an hour without power costs you—spoiled food, missed work, medical equipment). If outages are frequent or costly, backup value rises fast.

Batteries 101: Do You Need Them—and How Big?

  • Need them?
    • Grid-tied: No (unless you want backup or to shift usage).
    • Off-grid: Yes (non-negotiable).
    • Hybrid: Optional but recommended for outage resilience.
  • Chemistries (fast take):
    • LFP (LiFePO₄): high cycle life, stable, great for daily cycling.
    • NMC: higher energy density; often used in whole-home batteries.
    • Lead-acid (FLA/AGM): lower cost upfront, more maintenance, lower cycle life.

Simple Battery Sizing (Start Here)

  1. List critical loads you want running in an outage (W) and hours/day.
  2. Daily energy = sum(W × hours) → kWh/day.
  3. Days of autonomy: choose 1–3 days (climate + outage history).
  4. Battery size (raw) = kWh/day × days of autonomy.
  5. Adjust for depth-of-discharge & round-trip efficiency.
  6. Check surge loads (well pump, AC, tools) against inverter surge specs.

Tip: Do the critical loads list first. It keeps budgets and expectations grounded.


Net Metering & Buyback Rates (Grid-Tied Only)

  • How credits work: excess solar flows to the grid; you get credits or a buyback at a defined rate. Some utilities use time-of-use pricing (peak/off-peak), altering the value of what you export.
  • Self-consumption still matters: running dishwashers, EV charging, or water heating when the sun is strong can beat exporting at low rates.
  • Interconnection: expect an application, a meter swap or programming, and a permission-to-operate (PTO) before you can export.

Can Off-Grid Power a Whole House Year-Round?

Yes—with careful planning. The hard parts are seasonal solar swings and surge loads. Most off-grid homes also include:

  • Generator with auto-start for long cloudy periods.
  • Load management habits: laundry/cooking when the sun is strong, LED lighting, efficient appliances, heat-pump tech where possible.
  • Winter strategy: more panels, more storage, or more generator runtime.
    I learned to time “big” chores for sunny hours and it made winter surprisingly smooth.

Maintenance: What’s Different?

  • Grid-Tied: lowest maintenance—keep an eye on monitoring alerts, occasional visual checks, maybe light cleaning.
  • Off-Grid: highest—battery health checks, ventilation, firmware, periodic generator oil/filters, and a small spares kit (fuses, breakers).
  • Hybrid: in between—battery health + usual grid-tied checks.

Sizing & Components: How Designs Diverge

  • Grid-Tied: size the array to offset your bill; choose string or microinverters; meet rapid-shutdown and local code.
  • Off-Grid: start with loads → pick battery bank → choose inverter/charger → size array to recharge batteries in your worst solar month.
  • Hybrid: battery-ready inverter, transfer equipment, and a critical-loads subpanel (or whole-home if sized accordingly).
  • Consider wire gauge, overcurrent protection, surge protection devices, roof vs. ground-mount, shading, and conductor runs.

Permits, Inspections, and Incentives

  • Permits/Inspections: electrical + structural plan set, rough and final inspections, and for grid/hybrid, utility interconnection.
  • Incentives: federal/state/utility programs vary; some reward battery storage and load shifting in addition to panels.
  • Pro tip: check AHJ requirements early. It avoids redesigns later.

Hybrid: Best of Both—or a Compromise?

If your top goal is outage resilience without leaving the grid, hybrid fits beautifully: you keep bills low and lights on for essentials. Expect added complexity and plan for battery lifecycle (capacity fades slowly over time). For many families—especially with WFH, medical equipment, or frequent storms—a hybrid is the sweet spot.


Decision Guide (Follow the Flow)

  1. How often do you lose power? Rare → grid-tied; frequent/costly → hybrid or off-grid.
  2. Do you have utility access? No → off-grid.
  3. Budget vs. resilience: prioritize savings → grid-tied; resilience → hybrid/off-grid.
  4. Site factors: shading/roof space/roof age can steer you to ground mounts or smaller arrays with higher efficiency.
  5. Lifestyle flexibility: willing to shift loads? You’ll squeeze more value from any system.

Mini Case Studies

  • City Condo, Grid-Tied: stable grid, time-of-use rates; no batteries; bills drop, and life stays simple.
  • Rural Home, Hybrid: frequent storms; 10–15 kWh battery keeps fridge, lights, internet, and a few outlets alive for 1–2 days.
  • Cabin, Off-Grid: efficient appliances + generator auto-start; chores timed with sun; winter adds a bit of generator runtime.

Common Mistakes to Avoid

  • Assuming panels = blackout power (they don’t, unless hybrid/off-grid).
  • Under-sizing batteries or ignoring surge loads.
  • Skipping interconnection steps (grid/hybrid).
  • Forgetting maintenance and replacement timelines.
  • Designing off-grid from “panel count” instead of loads-first.

Step-by-Step: Plan Your System

  1. List critical loads and estimate daily kWh.
  2. Check outage history and set resilience goals.
  3. Research incentives and interconnection rules.
  4. Pick architecture: grid-tied / off-grid / hybrid.
  5. Size batteries (if needed) and choose the inverter type.
  6. Right-size the array for climate and roof/ground space.
  7. Prepare permit documents and schedule inspections.
  8. Set up monitoring and a simple maintenance calendar.

FAQs (Quick Hits)

  1. Core difference? Grid-tied connects to utility (credits, lower cost); off-grid is independent (batteries/generator); hybrid blends both.
  2. Cheaper upfront vs. lifetime? Grid-tied is cheapest upfront and per kWh; off-grid costs more (batteries/generator); hybrid sits in between.
  3. Blackouts with grid-tied? Standard grid-tied shuts off; you need a hybrid inverter + batteries for backup.
  4. Do I need batteries? Off-grid: yes. Grid-tied: no (unless you want backup or load shifting). Hybrid: recommended for outages.
  5. Net metering/buyback? Credits for exports; terms vary; time-of-use pricing can change the math.
  6. Whole-house off-grid? Yes, with careful sizing and lifestyle tweaks, plus generator support.
  7. Maintenance differences? Off-grid is the highest (batteries, generator). Grid-tied is the lowest. Hybrid is mid.
  8. Sizing differences? Grid-tied: offset bills. Off-grid: start with loads → batteries → array. Hybrid: backup first, then optimize savings.
  9. Permits/inspections? All need AHJ permits; grid/hybrid also need utility interconnection and PTO.
  10. Hybrid vs. pure types? Hybrid gives outage resilience with grid benefits; more complex than grid-tied, simpler than full off-grid.
  11. Best for me? Base it on outages, budget, site, and goals. Use the decision guide above.

Glossary (Plain-English)

  • Anti-islanding: a safety feature that shuts grid-tied systems off during outages.
  • Critical-loads subpanel: a small panel feeding only essential circuits during backup.
  • Days of autonomy: how many days your batteries can power loads without sun.
  • Depth of discharge (DoD): how much of a battery’s capacity you use each cycle.
  • PTO: permission to operate from the utility for exporting power.
  • Time-of-use (TOU): utility rates that change by time of day.

Reader Takeaways

  • Decide savings vs. resilience first.
  • Batteries are mandatory off-grid, optional for grid-tied, and powerful for hybrids.
  • Start designs with loads, not panel counts.
  • Understand interconnection rules early.
  • A small, well-chosen backup list makes outages easy to ride out.

Internal Links

Solar Panel System Components Explained (Easy Guide)

Solar panel system components explained in plain English—panels, inverters, batteries, safety, and monitoring—so you can choose the right setup confidently.

Why I Finally Mapped My Whole System

When I first looked into solar, I thought panels were the whole story. I pointed at a shiny black rectangle and said, “That. I need that.” Then I saw the diagrams. Inverter types. Rapid shutdown. Net meters. My eyes glazed over.

So I did the simplest thing: I drew a crude sketch of how everything connects. That sketch saved me weeks of confusion and a couple of expensive re-do’s. In this guide, I’ll walk you through the same map—plain language, no fluff—so you can pick the right components with confidence.

Promise: By the end, you’ll know what each part does, how it fits, and a simple way to choose components for your home.


Skimmer’s Corner: The 10-Second System Map

  • Sunlight → Panels → DC power
  • Inverter (string, microinverters, or DC optimizers) → AC power
  • (Optional) Battery + Hybrid inverter/charge controller
  • Safety & BOS: racking, wiring, combiner, disconnects, breakers, rapid shutdown
  • Meters & Monitoring: net meter / production meter + app/portal

Quick takeaway: Panels collect energy. Inverters make it usable. Batteries store it. Safety gear keeps it compliant. Meters and apps keep you informed.


Core Components at a Glance

Solar Panels (Modules)

Panels turn sunlight into DC power. The spec sheet tells you three things I actually care about:

  • Watts (W): nameplate output under test conditions.
  • Efficiency (%): how much sunlight becomes electricity—handy when roof space is tight.
  • Temperature coefficient: how performance changes on hot days.

Types you’ll hear about:

  • Monocrystalline: high efficiency, sleek look.
  • Polycrystalline: usually slightly lower efficiency, solid value.
  • Bifacial: can collect light from the back side—often better on reflective surfaces or ground mounts.

When panel efficiency matters: limited roof area, hot climates, or when you want the most kW in a small footprint.


Mounting & Racking

Racking holds your array in place and keeps the roof dry.

  • Roof vs. ground mount: Roof is common and tidy. Ground mounts shine when you want perfect tilt, easy cleaning, or future expansion.
  • Rails vs. rail-less: Rails simplify alignment; rail-less trims weight and parts.
  • Weather loads: Proper attachments and flashing handle wind and snow. If you see water stains in your attic after installation, something’s wrong—speak up early.

Balance of System (BOS) You Shouldn’t Ignore

BOS is the quiet hero—wiring, connectors, combiner boxes, disconnects, breakers, fuses, conduit, junction boxes, labels. It’s what inspectors examine first. Good BOS means clean wire runs, correct wire gauge, and overcurrent protection that matches your inverter and strings.

Skimmer cue: If the BOS is tidy, the install usually is too.


Inverters Explained (and Which One I Chose)

What an Inverter Does (Plain English)

Inverters turn the panels’ DC into AC that your home uses. They also manage safety features, talk to the grid, and feed your monitoring app. The inverter type you choose affects performance in shade, ease of expansion, and maintenance down the road.

String Inverters

  • Pros: Simple, one central box, easy service access.
  • Cons: One panel’s shade affects the whole string; single point of failure.
  • Best for: Full-sun roofs with simple, unshaded planes.

Microinverters

  • Pros: Panel-level conversion and optimization; great with partial shade and complex roofs.
  • Cons: More devices on the roof; rooftop service can be trickier.
  • Best for: Mixed shade, multiple roof planes, small add-on arrays.

DC Optimizers + Central Inverter

  • Pros: Panel-level MPPT with a central “brain”; strong monitoring.
  • Cons: You still have one central inverter to replace at the end of life.
  • Best for: Moderate shade, owners who want detailed per-panel data.

Quick Pick Guide
Full sun & simple layout → String inverter
Mixed shade/complex roof → Microinverters
In-between & data-curious → DC optimizers

What I chose: I went with microinverters because I have a goofy roof with a couple of shade lines. The panel-level control gave me peace of mind and the monitoring graphs I live for.


Do You Need a Battery? (My Honest Take)

What a Battery Actually Does

A battery stores excess solar energy for later. It powers critical loads during outages and can shift usage to evenings if your utility has time-of-use rates.

Key specs:

  • Usable capacity (kWh): how much energy you can actually use.
  • Power (kW): how many appliances you can run at once.
  • Round-trip efficiency & cycle life: how well it holds up.

Battery vs. Charge Controller vs. Hybrid Inverter

  • Battery: the storage tank.
  • Charge Controller: manages battery charging (often built into hybrid systems).
  • Hybrid Inverter: one box that coordinates PV, battery, and grid/backup.

Should You Add One Now—or Later?

Use this quick decision tree:

  1. Frequent outages or sensitive equipment? → Lean yes.
  2. Time-of-use rates or demand charges?Maybe, run the numbers.
  3. Simple net metering, stable grid? → Consider pre-wiring now, add later.

Pro tip: Even if you skip the battery, pick an inverter that’s battery-ready to avoid rip-and-replace later.


Safety & Code Bits That Keep You Out of Trouble

  • Rapid shutdown: lets responders de-energize conductors quickly.
  • Grounding/bonding: prevents shock hazards and stray currents.
  • AFCI/GFCI: arc-fault and ground-fault protection reduce fire and shock risks.
  • Disconnects & labeling: clear shutoffs for AC/DC; labels that match your single-line diagram.
  • Correct wire gauge & overcurrent protection: sized for voltage drop and code.

If your installer speaks confidently about these and shows them on the plans, you’re in good hands.


Meters, Interconnection & Monitoring (Make It Visible)

Meters You’ll Hear About

  • Net meter: tracks energy you push to and pull from the grid.
  • Production meter: tracks solar generation only (useful for incentives).
  • Smart meter: communicates with the utility for billing and grid management.

Monitoring Apps & Gateways

Look for:

  • Per-panel or per-string data
  • Alerting when production drops
  • Exportable logs for warranty claims or energy nerding

Why it matters: Monitoring is your early-warning system. A dusty panel or tripped breaker stands out fast.


Step-By-Step: Matching Components to Your Home

  1. Roof & Site Snapshot
    • Note orientation, tilt, and shade patterns. Count usable square feet.
    • Bonus: take photos at 9am, noon, and 3pm to “see” shade movement.
  2. Target Output
    • Pull 12 months of utility bills. Set a kWh/month goal.
    • Convert to array size (kW DC) using local production estimates.
  3. Panel Pick
    • If space is tight or hot, favor higher efficiency and better temp coefficient.
    • Otherwise, focus on total kWh/year, not just the fanciest panel.
  4. Inverter Choice
    • Use the Quick Pick Guide based on shade and roof complexity.
  5. Battery Plan
    • Decide now vs. later. If later, make sure your inverter and wiring are battery-ready.
    • Choose a whole-home or critical loads backup strategy.
  6. BOS & Safety
    • Plan wire runs, combiner/disconnect locations, and labeling early.
    • Confirm the rapid shutdown method with your installer.
  7. Monitoring
    • Decide if you want per-panel visibility. It helps with troubleshooting and expansion.
  8. Future-Proofing
    • Leave roof space and breaker capacity for an extra string or EV charger.
    • Consider a conduit to a battery location or a future subpanel.

Print-and-Plan Checklist
Panels □ Inverter □ Battery plan □ Racking □ Wiring □ Combiner □ Disconnects □ Rapid shutdown □ Meters □ Monitoring □ Spare breaker □ Conduit path □


Common Mistakes I See (And How to Avoid Them)

  • Picking panels before solving shade. Choose the inverter strategy first.
  • Chasing efficiency over kWh/year. Design for energy, not just percent.
  • Skipping rapid shutdown details. Ask “What’s our method?” and make sure it’s on the plans.
  • No monitoring plan. You can’t fix what you can’t see.
  • Zero expansion room. Leave the roof and electrical capacity for the future.

Mini-FAQ (Fast Answers)

What are the main components of a home solar PV system?
Panels, inverter (string/micro/optimizers), optional battery/hybrid inverter, racking, BOS wiring & safety, meters, and monitoring.

String vs. microinverters vs. optimizers—who wins?
It depends on shade and roof complexity. Full sun/simple → string. Mixed shade/complex → microinverters. In-between → optimizers.

Battery vs. charge controller vs. hybrid inverter—what’s the difference?
A battery stores energy. The charge controller manages charging. A hybrid inverter coordinates PV, battery, and grid/backup in one system.


My Shortlist of Specs That Actually Matter

  • Panel: watts, efficiency, temperature coefficient, product/performance warranty terms.
  • Inverter: max DC input, MPPT range, surge rating, communication/monitoring features.
  • Battery: usable kWh, continuous/surge kW, round-trip efficiency, cycle life, warranty.

Practical Takeaways (Save or Screenshot)

  • Pick the inverter around your shade and roof first.
  • Size panels to your kWh goal and roof space.
  • Choose battery-ready gear even if you aren’t buying a battery today.
  • Insist on monitoring that you’ll actually use.

What I’d Do If I Were Starting Today

  • Sunny, simple roof: high-watt mono panels + string inverter + pre-wire for battery.
  • Mixed shade / many planes: microinverters or optimizers + clear monitoring.
  • Backup-focused: hybrid inverter + battery now + critical loads subpanel.

Glossary (Plain-English)

  • PV: photovoltaic—turns light into electricity.
  • MPPT: maximum power point tracking—squeezes the most power out of panels.
  • BOS: balance of system—everything besides panels and the inverter.
  • Rapid shutdown: required method to quickly de-energize conductors on/near the array.
  • Nameplate: rated output under test conditions.
  • kW vs. kWh: kW is power (rate). kWh is energy (amount).
  • Round-trip efficiency: how much energy returns after charging and discharging a battery.

Internal Links