Microhomesteader.com empowers people in small spaces to build practical self‑reliance—growing food, generating power, and creating simple, resilient systems—one doable project at a time.
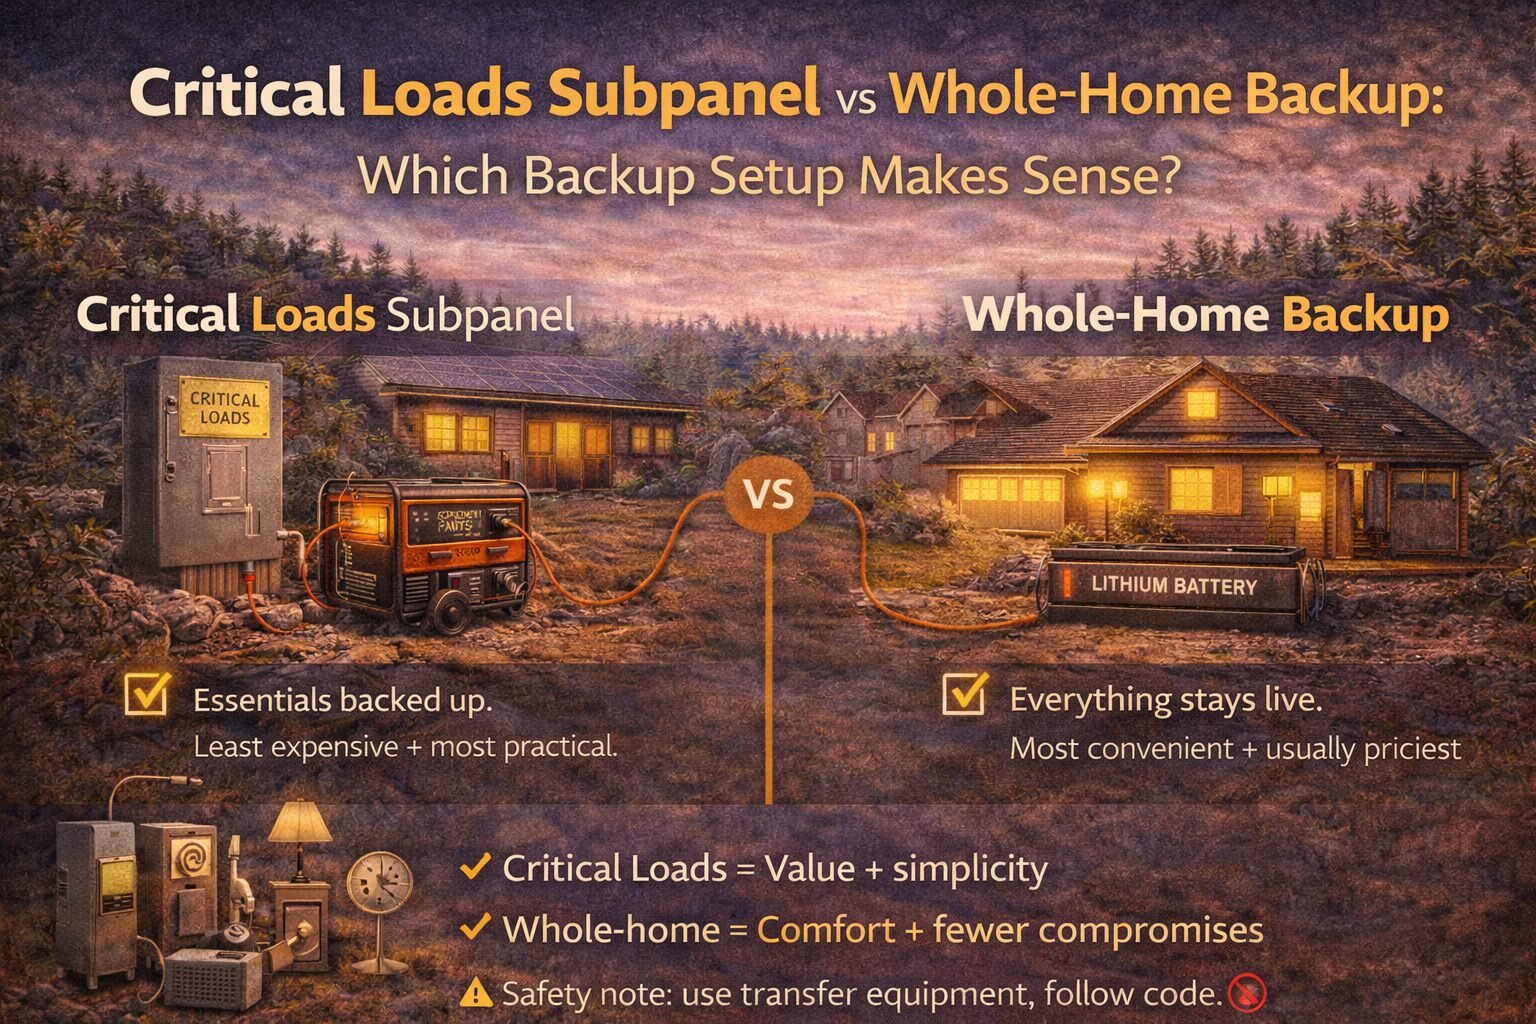
Critical loads subpanel or whole-home backup? Compare cost, complexity, comfort, and sizing so you pick the right setup for outages without overspending.
If you’ve been researching home backup power for more than 15 minutes, you’ve probably hit this fork in the road:
Do I back up just a few critical circuits… or the whole house?
And the internet answers it like this:
“Whole-home is best!”
“Critical loads are cheaper!”
“It depends!” (my least favorite answer)
So let me make this practical.
In this post, I’ll walk you through:
What a critical loads subpanel is
What whole-home backup really means
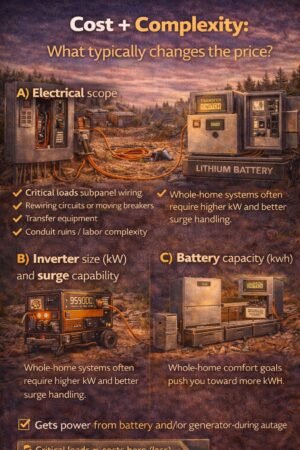
What usually costs more (and why)
simple decision paths so you can pick without regret
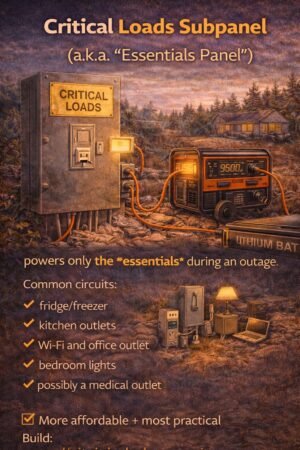
A critical loads subpanel is a separate, small panel that contains only the circuits you want powered during an outage.
Think of it like a “VIP section” for electricity.
Common circuits you’d put on it:
fridge/freezer
kitchen outlets (maybe just one circuit)
Wi-Fi/router and office outlet
bedroom lights
bathroom outlet
medical device outlet
maybe a small pump or a few specific outlets
During an outage, your battery system (or generator + transfer setup) powers that panel.
Whole-home backup
Whole-home backup means the entire main panel can stay energized during an outage—so any circuit can run.
Important note: “whole-home” does not automatically mean “run everything at once like normal.” It means the panel is live, and then your system still has limits (battery kWh, inverter kW, surge, etc.).
The biggest misconception: whole-home doesn’t mean unlimited
Even with whole-home backup, you still have to respect:
Step 3) Do you have any “big loads” you refuse to live without?
Examples:
central AC
well pump (can be huge surge)
electric range/oven
electric water heater
dryer
If you “must” run big loads, the critical loads subpanel may still work… but you’ll be much more selective (or you’ll add a generator + specific circuits).
Step 4) Choose your path
Path A: Choose a critical loads subpanel if…
You want maximum value
You can live without big appliances during outages
You prefer a system that’s hard to overload accidentally
Your goal is “keep it running,” not “live like normal.”
Path B: Choose whole-home backup if…
You want a seamless experience
You’re willing to pay more for convenience
You’ll use monitoring/load management responsibly
You have medical needs or business needs that justify comfort + flexibility
Real-world examples (what this looks like)
Example 1: “Keep it running” home (best for critical loads)
Backed-up circuits:
fridge + freezer
Wi-Fi + office outlet
bedroom lights + phone charging
one bathroom outlet
a couple of kitchen outlets
This usually pairs well with:
modest battery sizing
good surge handling for fridge/freezer
optional generator for long cloudy stretches
Example 2: “Comfort mode” home (either can work)
They want:
fridge/freezer + lights
fans
microwave sometimes
more outlets live
This can go either way:
a bigger critical loads subpanel, or
whole-home with careful load use
Example 3: “I want AC during outages” (whole-home tends to be more realistic)
This typically pushes you toward:
larger inverter
more battery
Sometimes generator support
load management
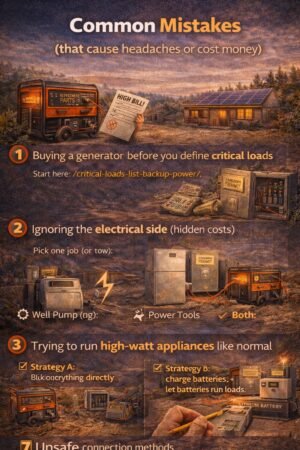
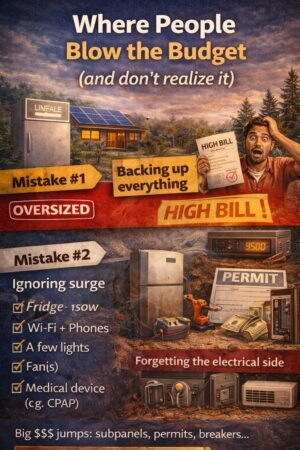
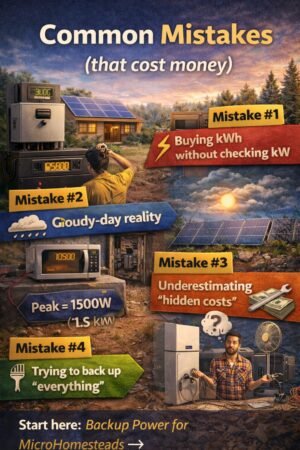
Common mistakes (that cost money)
Mistake #1: Choosing whole-home because it “sounds better.”
Whole-home is great… if you can afford the kW/kWh that matches your expectations.
Mistake #2: Building a critical loads panel but forgetting the “surge” issue
Fridge compressors, pumps, and motors can trip smaller inverters.
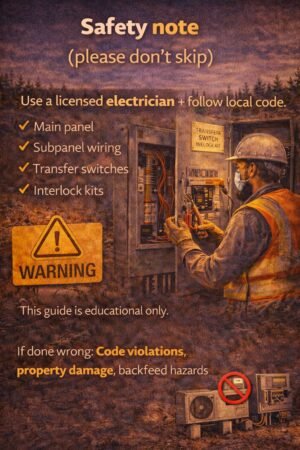
Mistake #3: Forgetting the hidden electrical work
A lot of backup projects are really “electrical projects with a battery attached.”
Anything involving your main panel, subpanel wiring, transfer switches, or interlocks should be handled by a licensed electrician and follow local code. This post is educational only.
FAQ
Do I need a critical loads subpanel if I have a power station?
Not always. Many people run a fridge and a few essentials with extension cords in an outage. It’s not as clean or seamless, but it can work for “simple backup.”
Does whole-home backup increase my electric bill?
Not directly. It’s about outage capability, not regular grid use. But it can indirectly encourage running more loads during outages, which increases backup system needs.
Can I start with critical loads and upgrade later?
Yes—and that’s honestly one of the smartest approaches. Build a reliable “survive-first” system, then expand if you find you really want more comfort.
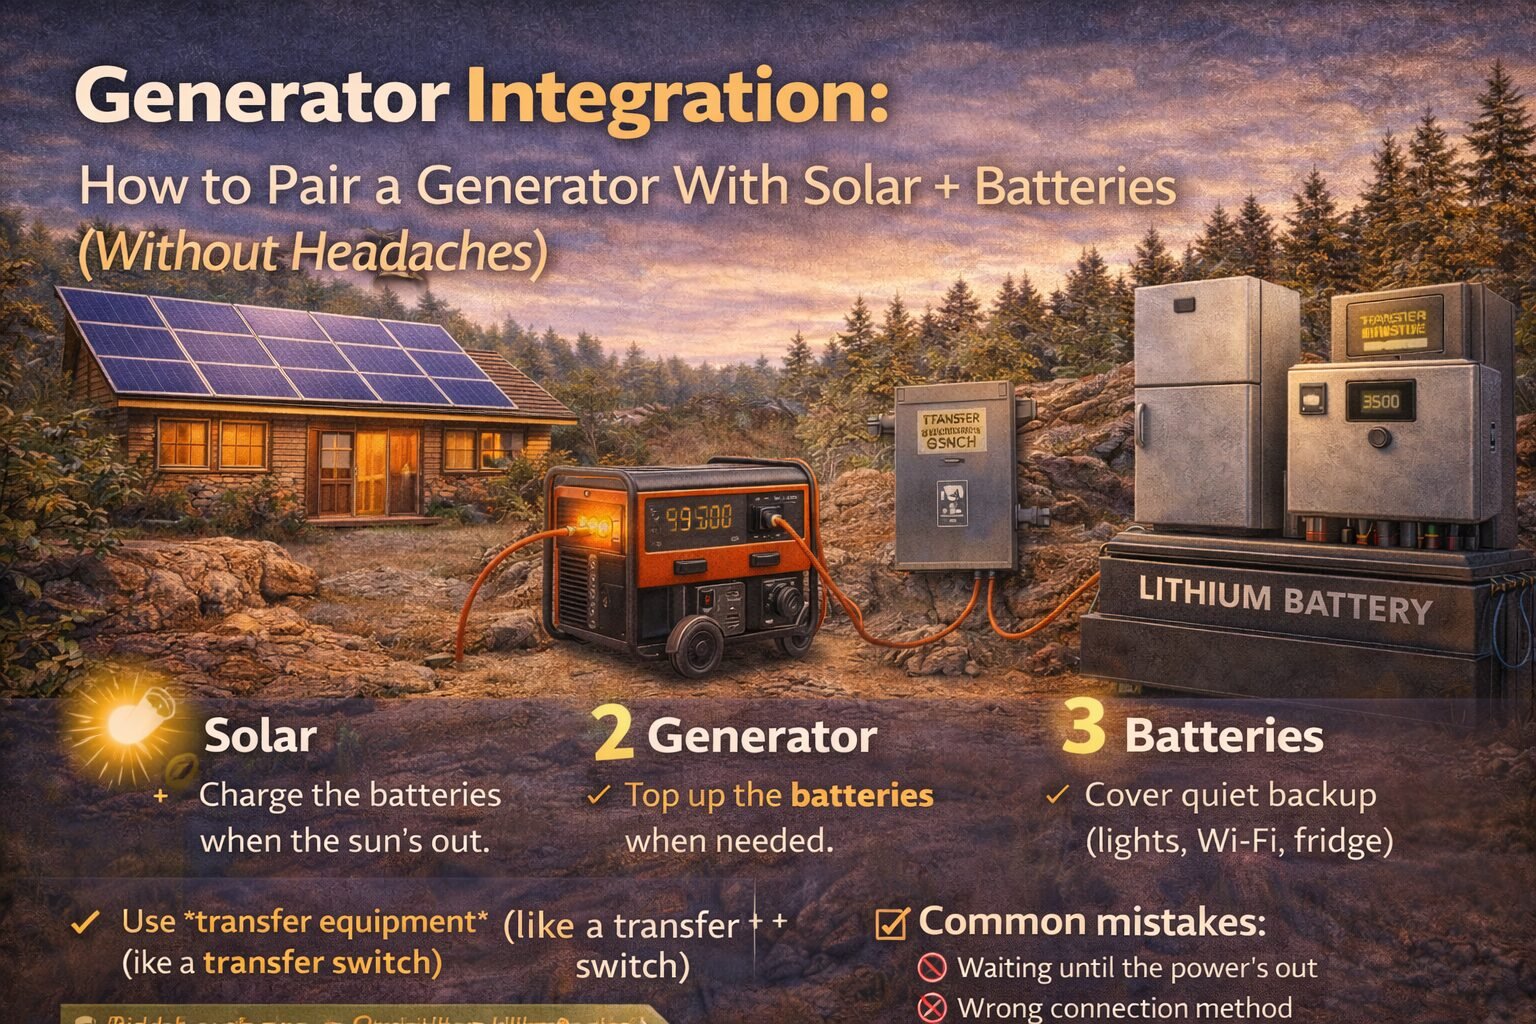
Learn how generator integration works with solar + batteries: when it’s worth it, safe connection options, sizing tips, and common mistakes to avoid.
Understanding generator integration with solar systems is crucial for optimal performance.
Generator integration with solar offers flexibility in energy management.
With generator integration with solar, you can ensure a consistent power supply.
Proper generator integration with solar systems provides peace of mind during outages.
Utilizing generator integration with solar can maximize efficiency and save costs.
Generator integration with solar is key to a sustainable energy future.
Smart generator integration with solar systems can lower your energy bills.
Learn about generator integration with solar for enhanced power reliability.
I used to think adding a generator to a solar + battery setup was “cheating.”
Then I lived through enough real-world outage scenarios (cloudy days, weird load spikes, long restoration times) to realize something:
Generator integration with solar is becoming increasingly popular for home setups.
A generator isn’t the enemy. A generator is your “plan B” when the sun doesn’t cooperate.
The concept of generator integration with solar is essential for modern energy solutions.
If your backup goal is “hours,” batteries are often enough. If your backup goal is “days,” generator integration with solar can be the cheapest and most reliable way to get there.
This post explains how to pair a generator with solar + batteries without creating a Frankenstein system.
This post explains how to pair a generator with generator integration with solar + batteries without creating a Frankenstein system.
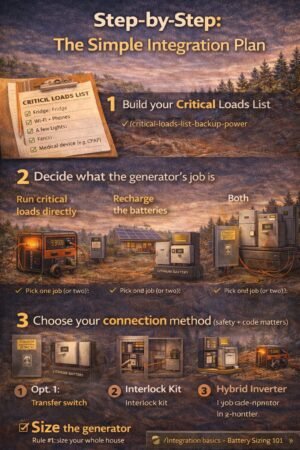
If you skip this step, you’ll oversize everything and waste money.
Step 2) Decide what the generator’s job is
Pick one job (or two):
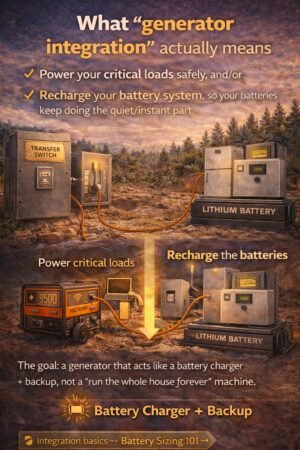
Job A: “Run critical loads directly.”
This is common if you don’t have a battery system yet.
Job B: “Recharge the batteries.”
This is common if you have (or want) a battery system and you want the generator to run less often.
Job C: “Both”
A lot of hybrid setups can do both, depending on the equipment.
Step 3) Choose your connection method (safety + code matters)
This is the part where I’m going to be blunt:
Do not backfeed your home through a dryer outlet or a sketchy plug. It’s dangerous and illegal in many places, and it can put utility workers at risk.
Here are the legit options you’ll hear about:
Option 1: Transfer switch (common, clean)
Designed to safely switch your home/critical loads between the grid and the generator
Often used for “generator → loads” setups
Can be manual or automatic (more expensive)
Option 2: Interlock kit (often cheaper, still legit when installed correctly)
Mechanically prevents the main breaker and generator breaker from being on at the same time
A cost-effective solution in many homes
Still needs correct installation and labeling
Option 3: Hybrid inverter/battery system with generator input
Many battery/inverter systems can accept generator input and manage charging
This is usually the “smoothest” user experience if you’re building a solar+battery system anyway
Safety note: anything involving your panel, transfer equipment, or permanent wiring should be done by a licensed electrician and meet local code. This is educational.
Step 4) Size the generator (the practical approach)
Generator sizing is where people either overspend or regret everything.
Generator integration with solar enhances the resilience of power systems.
Rule #1: Size for critical loads, not your whole house
Efficient generator integration with solar is essential for modern homes.
Achieve energy independence through generator integration with solar systems.
If your critical loads are:
fridge + freezer
Wi-Fi + lights
fans
laptop charging
…you usually don’t need a monster generator.
Rule #2: Respect surge loads
Motors (fridge compressors, pumps) have a startup surge. If you have a well pump, treat it as a special case.
Often yes, depending on your inverter/charger setup. Many systems are designed for this, but it depends on the equipment and wiring.
Is a generator cheaper than adding more batteries?
Often, yes—especially if you’re trying to cover multi-day outages. Batteries are incredible, but adding lots of kWh gets expensive fast.
Do I need an automatic transfer switch?
Not necessarily. Manual setups work fine for many people. The “right” answer depends on how often you’ll use it and how hands-off you want it.
What’s the safest way to connect a generator to my house?
A properly installed transfer switch or interlock kit (or a hybrid system designed for generator input). Always follow local code and use a licensed electrician.
Make a critical loads list fast: pick essentials, estimate watts + hours, plan for surge, and size your backup system without overspending.
When the power goes out, most of us do the same thing:
We stare at the dark house and think, “Okay… what do I actually need right now?”
And then we panic-buy solutions based on vibes. (Been there.)
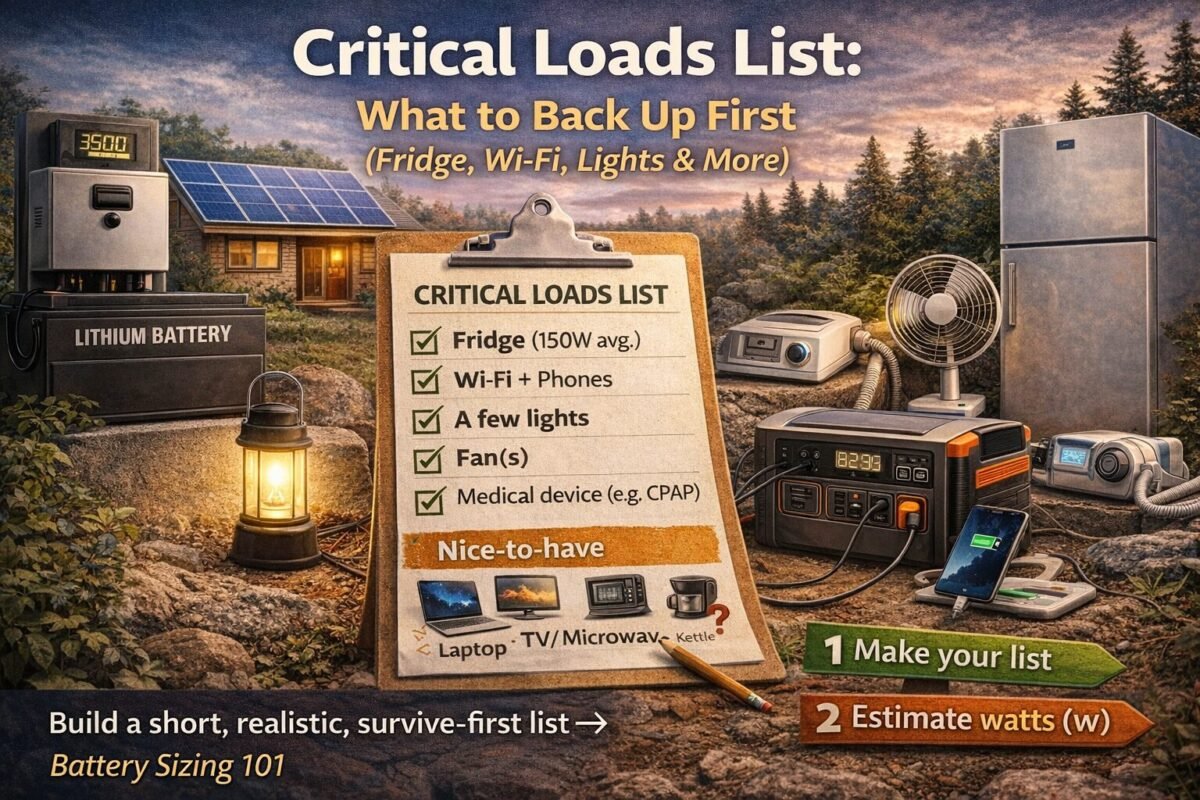
This post is the fix. You’re going to build a Critical Loads List—a short, realistic list of devices you must keep running during an outage—so your battery sizing and backup plan finally make sense.
Anything involving your electrical panel, transfer equipment, or permanent wiring should be handled by a licensed electrician and follow local code. This post is educational only.
FAQ
What are the most important critical loads?
For most homes: fridge/freezer, Wi-Fi/phones, a few lights, and fans. Add medical devices if needed.
How do I estimate my fridge’s energy use?
Best method: measure with a plug-in meter over a day or two. If you can’t, use a conservative estimate and build in a cushion.
Can I run a fridge from a small power station?
Sometimes—especially short-term—but fridges have surge and cycle behaviour that can surprise you. Your inverter rating (kW) matters, not just battery size (kWh). /battery-sizing-101-kwh-kw-surge/
What should I do after I make my list?
Turn it into battery sizing math and pick your backup style:
Size backup power the easy way: list critical loads, calculate daily kWh, account for surge watts, then pick the right battery + inverter. Understanding battery sizing for solar is essential for optimal performance.
Battery sizing for solar is a critical component in ensuring you have reliable energy storage. Proper battery sizing for solar can prevent issues like overloading or underutilizing your system.
When I first started looking at batteries, I thought it was a simple question:
“How many hours will this battery last?”
Turns out, that’s only half the story.
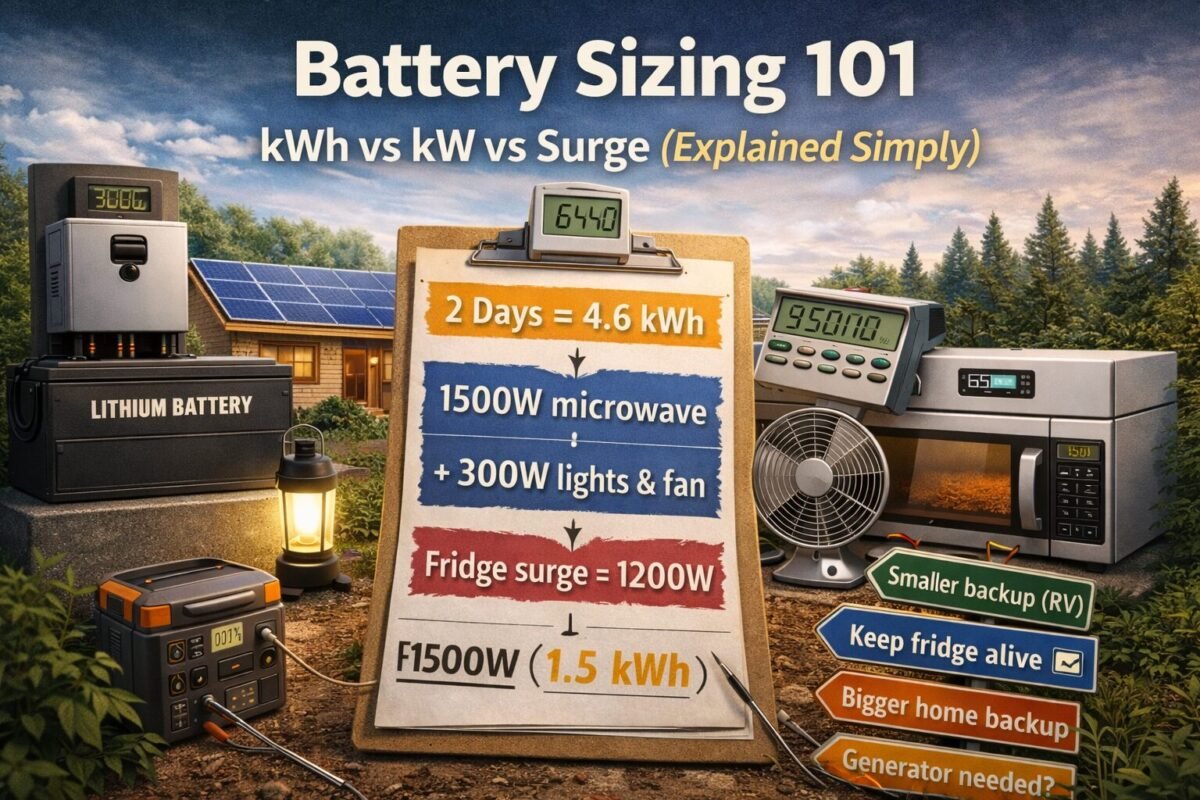
Battery sizing gets confusing because we’re really juggling two different problems:
kWh = how long you can run stuff (energy)
kW = how much you can run at once (power)
Surge watts = the momentary “kick” some appliances need (starting power)
If you size for only one of these, you can end up with a battery that looks great on paper… but trips, shuts off, or disappoints when you actually need it.
Let’s fix that.
TL;DR
Make a critical loads list (what you must run).
Calculate your daily energy (kWh/day).
Check your peak watts + surge (kW).
Choose battery size with a little “real life” cushion for losses + cloudy days.
Don’t forget the hidden add-ons (panel upgrades, subpanels, electrical work).
When considering your setup, remember that battery sizing for solar impacts not only efficiency but also your overall system reliability.
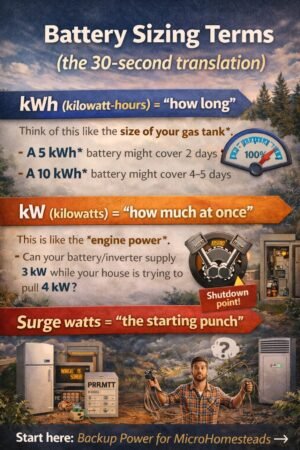
kWh (kilowatt-hours) = “how long”
Think of this like the size of your gas tank.
If your loads use 2 kWh per day, then:
A 5 kWh usable battery might cover ~2 days (in perfect conditions)
A 10 kWh usable battery might cover ~4–5 days
Ultimately, effective battery sizing for solar will ensure you have the right amount of power when you need it most.
kW (kilowatts) = “how much at once”
This is like the engine power.
If your battery/inverter can supply 3 kW, and your house tries to pull 4 kW, something gives (usually: shutdown).
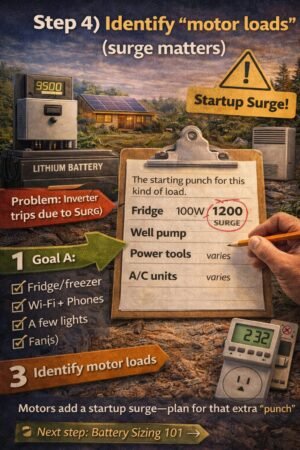
Surge watts = “the starting punch”
To successfully implement battery sizing for solar, you must consider the unique demands of your energy needs and the expected performance of your system.
Motors do this all the time:
fridge compressor start
Well pump start
power tools
some AC systems
When estimating energy needs, keep the principles of battery sizing for solar at the forefront of your planning process for better results.
You might run a fridge at 150W… but it may spike much higher for a second or two at startup.
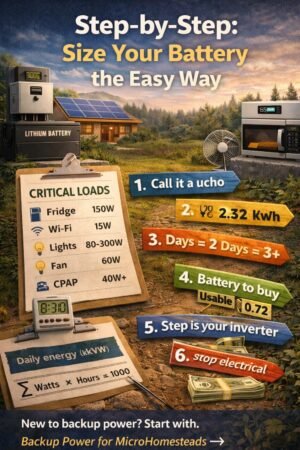
Step-by-step: size your battery the easy way
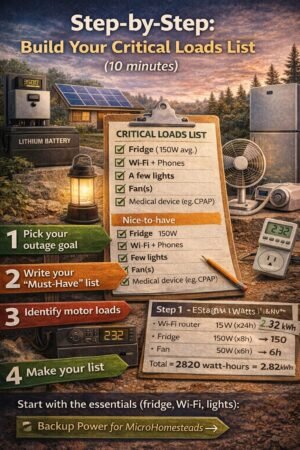
Step 1) List your critical loads (don’t skip this)
Write down what you truly want running in an outage.
Here are common “microhomestead critical loads”:
Fridge + freezer
Wi-Fi/router + phones
A few lights
Fans
Medical devices (CPAP, etc.)
Laptop/charging
(Maybe) microwave/kettle occasionally
(Maybe) well pump (big surge!)
If you haven’t done it yet, create a simple list first. (I like a clipboard list I can literally grab during a storm.)
Step 2) Estimate watts (W) and hours per day
You can get watts three ways:
Nameplate label on the device (easy, but sometimes misleading)
Kill-A-Watt / power meter (best for plug-in devices)
Manufacturer spec sheet (useful for pumps/AC)
Quick starter table (ballpark)
Use this as a starting point—verify your real numbers if possible.
Load
Typical watts (running)
Notes
Wi-Fi router
10–20W
Easy win
LED light (each)
8–15W
Multiply by how many
Phone charging
5–20W
Depends on fast charging
Laptop
30–90W
Workloads vary
Fan
20–80W
High impact over time
Fridge (average)
100–200W
Cycles on/off
Chest freezer (average)
80–150W
Cycles on/off
Microwave
800–1500W
Short bursts, big peak
Well pump
varies a lot
Often big surge
Understanding the importance of battery sizing for solar will allow you to maximize the efficiency and effectiveness of your energy system.
Step 3) Calculate daily energy (kWh/day)
This is the math that makes everything click.
Daily kWh = Σ (Watts × Hours) ÷ 1000
Example “Keep-it-running” kit
Let’s say you want:
Fridge (average 150W) for ~8 hours/day equivalent (because it cycles)
If your inverter is only 1 kW, you’re going to hate life.
Step 7) Account for the surge
Motors can surge 2–7× for a moment.
Practical approach:
If you have a fridge/freezer only, many systems handle it fine.
If you have well pumps or large compressors, you must plan surge carefully.
Rule of thumb I use: If you’re backing up motors (fridge/freezer/pump), pick an inverter that can handle your peak running watts plus startup surge without tripping.
If you’re unsure, don’t guess—treat pumps as “special loads” and look up their specs.
Effective battery sizing for solar can save you money in the long run by preventing costly upgrades and ensuring adequate energy supply.
Simple decision paths (pick one)
A: “Keep it simple” (phones/lights/Wi-Fi + small devices)
Great for apartments, small homes, quick outages, camping/RV style
Start with critical loads first. You can always expand later.
FAQ
How big a battery do I need to run a fridge overnight?
It depends on your fridge’s efficiency and how often it cycles. A common starting point is to estimate 1–2 kWh for the fridge portion for overnight, then add your other loads and losses. If you want reliable results, measure with a plug-in power meter.
What’s the difference between battery capacity and inverter size?
Battery capacity (kWh) is the runtime. Inverter size (kW) is how much you can run at once, including surge.
Can I size smaller if I have solar panels?
Many factors influence battery sizing for solar, so consider all variables before making your decision.
Should I go “whole home” backup?
With battery sizing for solar, you can ensure that your backup system meets the specific demands of your household.
Next step (don’t stop here)
Build your Critical Loads List (it makes everything easier).
Run this math with your real appliances (or at least a realistic estimate).
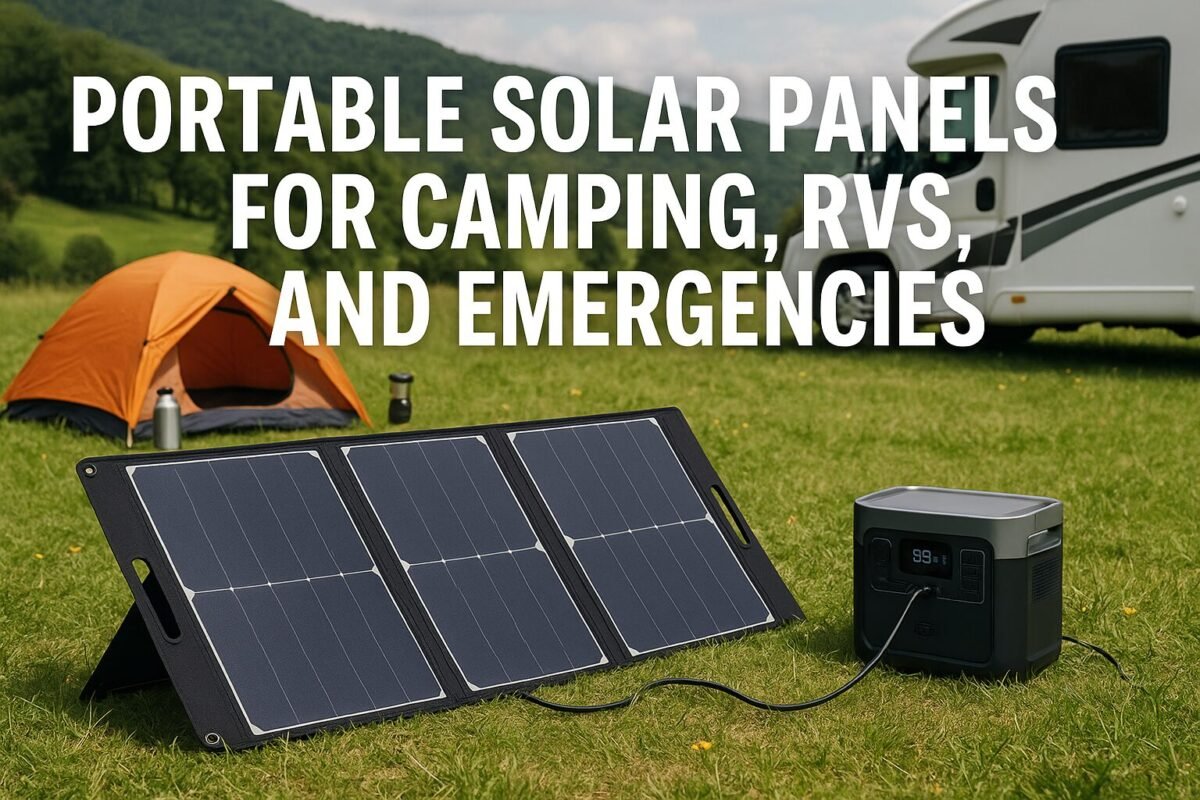
Learn how to choose, size, and use portable solar panels for camping, RVs, and emergency backup—plus real-life tips, and example setups. With the rise of portable solar panels for camping, it’s easier than ever to power your devices while enjoying nature.
As you plan your next adventure, don’t forget about portable solar panels for camping as a reliable power solution.
I still remember the first time I dragged a little “solar kit” to a campsite. I thought I was a genius… right up until the panel spent most of the day in the shade, my phone barely charged, and my lantern died halfway through a card game.
Portable solar panels for camping are a game changer, allowing you to charge your gadgets and keep the lights on during your outdoor adventures.
If you’ve ever wondered:
“What size portable solar panel do I really need?”
“Can this thing actually run my fridge or just my phone?”
“Is it strong enough for emergencies, or is it just a toy?”
…this post is for you.
Think of this as the hand-holding, no-math-degree-needed guide to portable solar for camping, RVs, and power outages at home.
TL;DR Snapshot
If you only read one thing, make it this:
For weekend camping (phones, lights, small fan): Start with a 100W folding solar panel + a 300–500Wh power station.
For RVs/vanlife (lights, fridge, devices): Aim for 200–400W of portable panels + a 1,000Wh+ power station or house battery.
For emergencies at home (phones, lights, small devices): Plan on 200W+ of panels + 500–1,000Wh of storage as a “keep the basics alive” kit.
Portable solar is great for small stuff and quiet backup. It’s not a magic “power my whole house forever” solution.
You can absolutely start small, learn as you go, and grow your kit over time.
Skim-Stopper Box: Super-Quick Answers
Q: Can a portable solar panel power my whole RV or house? A: Usually no. Portable panels are better for charging a battery that runs small stuff (lights, phones, fans, maybe a small fridge).
Q: What size panel should I get for camping? A: Most people are happy with a folding 100W panel + 300–500Wh power station.
Q: How do I know if it’s big enough? A: Add up what you want to run in a day (in watt-hours), then make sure your battery stores that much and your panel can refill most of that on a sunny day. I’ll walk through this step by step below.
Q: Is portable solar worth it for emergencies? A: If you want quiet power for phones, lights, radios, and medical devices, yes. It’s not a whole-house solution, but it can make outages a lot less stressful.
1. What Counts as “Portable Solar”?
For long trips, consider investing in high-capacity portable solar panels for camping.
When I say portable solar, I’m talking about:
Folding/briefcase panels
Panels that fold up like a suitcase with a handle.
Often 60W, 100W, 200W, etc.
Great for camping and RVs.
Flexible or roll-up panels
Lighter, sometimes less durable.
It can be strapped to a backpack, tent, or RV roof.
Portable “solar generator” or power station + panel
The “box” with outlets is actually a battery with an inverter.
The portable panel plugs in to charge the battery.
Nice all-in-one option for non-techy folks.
Tiny trickle chargers (5–20W)
Good for keeping a car battery topped off or slowly charging a phone.
Not enough if you want to run multiple devices daily.
Portable solar panels for camping have revolutionized the way we think about outdoor power solutions.
With portable solar panels for camping, you can ensure that your essential devices stay operational even in remote areas.
The important thing to remember:
Portable panels charge a battery. The battery actually runs your stuff.
You’ll see panels and power stations sold together as kits, but you can also mix and match.
If you’re brand new to solar in general, it might help to quickly scan a beginner’s guide first, then hop back here: 👉 How Solar Works (Beginner Guide)
Portable Solar Panels for Camping: A Quick Overview
2. Step-by-Step: How to Size a Portable Solar Setup (No Math Degree Needed)
Let’s walk through this like we’re planning a weekend camping trip.
Step 1: Decide what you want to power
Make a simple list. For example:
2 phones
1 LED lantern
1 small USB fan at night
Maybe a tablet or small laptop for a movie
Step 2: Find the “watts” and “hours”
You don’t need perfect numbers. Close is fine.
Phone: ~10W while charging, maybe 10–20Wh per full charge
LED lantern: ~5–10W
Small USB fan: ~5W
Tablet/laptop: 20–60W depending on size
Now guess how long you’ll use each per day:
Phones: 2 full charges per day, total → 40Wh
Lantern: 5W × 4 hours → 20Wh
Fan: 5W × 8 hours → 40Wh
Tablet: 30W × 2 hours → 60Wh
Add them up:
40 + 20 + 40 + 60 = 160Wh per day
Let’s pad it a bit for “real life” → call it 200Wh per day.
Step 3: Choose your battery (power station size)
Your battery or power station is rated in Wh (watt-hours).
For 200Wh/day, a 300–500Wh power station is perfect:
Enough room for cloudy moments and “oops” usage.
You won’t have to baby every single watt.
Step 4: Size your solar panel
Remember, portable solar panels for camping are not just a luxury; they can be essential for a smooth trip.
Your panel’s job is to refill the battery each day.
Very rough but practical rule of thumb:
Daily energy from panel ≈ Panel watts × 4 hours × 0.6 (real-world fudge factor)
That 0.6 accounts for shade, heat, imperfect aim, etc.
Example with a 100W panel:
100W × 4h × 0.6 ≈ 240Wh per sunny day
Perfect. That matches our 200Wh/day target with a bit of cushion.
So, for our simple camping example:
Battery: 300–500Wh
Panel: 100W folding panel
When selecting your portable solar panels for camping, consider the wattage and the type of devices you’ll be using.
This is why I say:
For most weekend campers, 100W panel + 300–500Wh power station feels “just right.”
3. Quick Starter Setups (Camping, RV, and Emergencies)
Here are some simple starting points. You can tweak up or down.
A. Lightweight Hiking / Minimalist Camping
You want: phone, headlamp, maybe a tiny fan.
Panel: 20–40W lightweight or foldable panel
Battery: 100–200Wh power bank/power station
Use case: Backpacking, bikepacking, or ultralight car camping.
You’ll be watching the weather and your usage a bit more closely, but it’s doable.
B. Car / Tent Camping (Most Common Scenario)
You want: phones, lanterns, a fan, maybe a tablet/laptop.
Panel: 80–120W folding panel
Battery: 300–500Wh power station
What it can realistically do:
Phones, lights, fans, and small gadgets daily.
Occasional use of a small laptop or mini-projector.
You’ll notice cloudy days, but you’re mostly comfortable.
C. Small RV / Van Boondocking
You want: lights, fans, water pump, fridge, devices.
Panel: 200–400W (two 100W suitcases or one bigger folding panel array)
Battery: 1,000–2,000Wh power station or RV house battery bank
What it can realistically do:
Run a 12V fridge reliably in decent weather.
Run LED lights, fans, devices, and small electronics.
Q: Can I use portable panels to charge my RV’s main batteries? A: Often yes, but you’ll need the right charge controller and wiring. Some portable kits are designed specifically to plug into RV systems. Always match the voltage and follow the instructions.
Q: What about cloudy days? A: Portable solar still works, just slower. This is why having a bit of extra battery is so nice—you ride through clouds on stored energy.
Q: Can I leave the panels out in the rain? A: Many are water-resistant, but always check the manual. The panel might be okay; the connections and battery usually are not. When in doubt, bring them in or cover them.
Q: Do I need an inverter? A: If you stick to USB and 12V gadgets, you might not. If you want to use standard wall plugs, either:
Use a power station (built-in inverter)
Or add a separate inverter (for advanced DIY setups)
9. Wrapping It Up: Start Small, Learn Fast, Upgrade Later
Portable solar can feel confusing when you’re staring at a wall of numbers and acronyms.
But if you boil it down, it’s really just:
Figure out what you want to power.
Choose a battery big enough for a day or two of that.
Pick a panel (or panels) that can refill that battery on a decent sunny day.
Set it in the sun, point it roughly at the sky, and start learning.
You don’t have to get it perfect on day one. Start with a simple camping kit, get hands-on experience, and let that teach you what you really want for your RV or emergency setup.
Investing in portable solar panels for camping not only enhances your experience but also ensures you have power when you need it most.
By using portable solar panels for camping, you can enjoy a more sustainable way to power your adventures.
There are numerous options for portable solar panels for camping that cater to different power needs.
Choosing the right portable solar panels for camping can make a significant difference in your outdoor experience.
For frequent campers, portable solar panels for camping are an essential investment.
Complement your adventure with portable solar panels for camping that fit your lifestyle and needs.
For those who love nature, portable solar panels for camping can provide a reliable power source anywhere.
With the advancements in technology, portable solar panels for camping are more efficient than ever.
Portable solar panels for camping allow you to enjoy modern conveniences without sacrificing your love for the outdoors.
Keep your devices powered with portable solar panels for camping, making your outdoor experiences more enjoyable.
Explore your options for portable solar panels for camping to find the best fit for your needs.
Don’t underestimate the capabilities of portable solar panels for camping; they can significantly enhance your outdoor experience.
Utilize portable solar panels for camping to ensure you have the power you need on your next trip.
Compare solar panel efficiency across monocrystalline, polycrystalline, and thin-film panels so you can choose the best type for your roof and budget.
When I first started looking at solar, I honestly thought all panels were basically the same rectangle with a different logo on the corner.
Then I started planning a real system.
Suddenly, I was swimming in terms like monocrystalline, polycrystalline, and thin-film… and every installer had a different opinion about which was “best.”
If you’re in that same “I just want to know what to put on my roof” phase, this guide is for you.
By the end, you’ll know:
Which type is most efficient in the real world
How much more energy can mono squeeze out of the same square footage
How cost, heat, shade, lifespan, and warranties differ
Which type actually makes sense for small roofs, weird roofs, RVs, and microhomesteads
Let’s make sense of this.
2. Quick Comparison Snapshot (For Skimmers)
Here’s the 10-second version:
Type
Typical Efficiency
Cost per Watt
Space Needed
Best For
Monocrystalline
Highest
Higher
Least roof area
Small roofs, high usage, long-term systems
Polycrystalline
Medium
Lower
More roof area
Larger roofs, budget installs
Thin-Film
Lowest (rooftop)
Panel cheap, BOS can be more
Most roof area
RVs, sheds, metal roofs, odd shapes, huge area
One-sentence takeaways:
Monocrystalline – Max power per square foot. Great when roof space is precious.
Polycrystalline – Solid middle ground if you have space and want to save a bit upfront.
Thin-Film – Lightweight, flexible, niche. Great for RVs, sheds, and large, simple metal roofs.
Now let’s slow down and unpack why.
3. What Are Mono, Poly, and Thin-Film Panels?
3.1 Monocrystalline Panels (Mono)
Made from a single crystal of silicon.
Cells look uniform and dark, often solid black or very dark gray.
Typical residential “modern” panels you see in new installs.
Known for high efficiency and a clean, uniform look.
In plain English: mono panels are like the “premium” option—more power from the same footprint.
3.2 Polycrystalline Panels (Poly)
Made from multiple crystals melted together.
Cells have a speckled, bluish look.
A bit less efficient than mono, but usually cheaper per panel.
Common in slightly older systems or more budget-conscious installs.
Think of poly as the “value” option: still good, just not quite as power-dense.
3.3 Thin-Film Panels
“Thin-film” isn’t one single thing; it’s a whole family:
Very thin layers of semiconductor are deposited on glass, metal, or flexible backing.
Can be flexible or rigid.
Often used on RVs, vans, metal roofs, and big commercial roofs.
Lower efficiency per square foot, but sometimes easier to install on tricky surfaces.
Thin-film is the oddball cousin: it doesn’t look like the classic framed rectangle, but it can go places conventional panels can’t.
4. Efficiency in the Real World
Key questions:
Which type is most efficient?
How much more energy per square foot does mono actually give you?
4.1 Lab Efficiency vs Real Rooftops
Panel datasheets love to shout about efficiency. That’s just:
How much of the sunlight hitting the panel gets turned into electricity.
But real-world output also depends on:
Roof angle and direction
Shade from trees, chimneys, neighbors
Heat buildup on the roof
Inverter, wiring, and other system losses
So we’ll talk about typical ranges, not perfect lab numbers.
4.2 Efficiency Comparison by Type
On a typical home roof, you’ll roughly see:
Monocrystalline: highest efficiency
Polycrystalline: a bit lower
Thin-film: lowest per square foot (but sometimes better in low light on huge roofs)
Let’s do a simple, same roof area comparison.
Say you’ve got 200 square feet of good roof:
Mono: might give you around 3.8 kW of panel capacity
Poly: closer to 3.2 kW
Thin-film: maybe around 2.3 kW
Over a year, if that roof sees decent sun, that same 200 sq ft might produce ballpark:
Mono: ~5,700 kWh
Poly: ~4,800 kWh
Thin-film: ~3,400 kWh
The exact numbers will depend on your location, but the relative difference is the point: Mono squeezes significantly more energy out of the same footprint.
4.3 When Efficiency Really Matters
Efficiency becomes a big deal when:
You have a small roof
You have lots of obstructions (vents, dormers, skylights)
You want to offset a big chunk of your usage
You’re planning for future loads (EV, mini-split, workshop, etc.)
For many microhomesteaders with limited space, monocrystalline is the go-to just because every square foot matters.
5. Cost Per Watt and Payback Time
Key question: How do cost differences per watt change payback?
5.1 Hardware Cost: Panel vs System
At the panel level, you’ll often see:
Mono: a bit more per watt
Poly: a bit less per watt
Thin-film: panel itself can be cheap per watt, but…
That’s only part of the story.
5.2 Balance of System (The Hidden Cost)
You don’t just pay for the panel. You also pay for:
Racking and mounting
Wiring and conduit
Inverter(s) and labor
Permits and inspections
Here’s the catch: if you choose lower-efficiency panels, you may need:
More panels
More racking
More clamps, wiring, and labor
So while poly or thin-film might look cheaper per panel, a bigger array can eat up that savings in mounting hardware and labor.
5.3 Payback and ROI by Panel Type
In many cases:
If roof space is free and abundant, poly can make sense as a budget play.
If roof space is tight or labor is pricey, paying a little more for mono can actually improve payback, because you get more kWh out of a similar install cost.
So the “cheapest panel” is not always the cheapest system or the fastest payback.
6. Heat, Shade, and Cloudy Days
Key questions:
Which type handles high heat better?
Which does better in shade and low light?
6.1 High-Temperature Performance
All silicon panels lose some efficiency when they get hot. Roofs get really hot in summer.
You’ll see this on datasheets as a temperature coefficient. Lower (in magnitude) is better.
Roughly speaking:
Mono and poly are similar, with mono often slightly better on modern models.
Thin-film can sometimes handle heat a bit differently, but because its baseline efficiency is lower, you still need more area to match output.
Practical takeaway: In a very hot, very sunny climate, you still usually pick good-quality mono. You just pay attention to the roof ventilation and airflow under the panels.
6.2 Shade and Cloudy Weather
No panel type loves shade. A small shadow on one part of a string can drag down the whole string.
In general:
Crystalline panels (mono/poly): solid in normal sun, but sensitive to hard shade (branches, chimneys).
Thin-film: lower peak efficiency, but sometimes behaves a bit better in soft, diffuse light (overcast days, evenly cloudy skies).
However, for a typical home roof, the bigger factors are:
Good array design (avoid shade paths)
Using optimizers or microinverters if you have unavoidable shade
Trimming or removing problem branches if possible
6.3 Matching Panel Type to Your Climate
Hot, sunny desert or tropical roof: Mono with good airflow and decent temperature coefficient.
Cool, cloudy climate with a big, simple roof: Mono or poly both work; arrays can be slightly bigger.
Mixed climate, lots of trees: Focus on shade-aware design and electronics more than changing panel type.
7. Lifespan, Degradation, and Warranties
Key questions:
How long do these panels actually last?
Do different types wear out faster?
Are warranties different?
7.1 Degradation Over Time
All panels gradually produce less over the years. You’ll see this as a % per year degradation.
Rough picture:
Mono: very low annual degradation on modern panels
Poly: similar ballpark, sometimes slightly higher
Thin-film: depends on the specific tech; some degrade faster, others are competitive
Over 20–25 years, a good mono panel might still be producing 80–90% of its original output. That’s a big deal for long-term planning.
7.2 Product vs Performance Warranties
Most manufacturers offer:
A product warranty – covers workmanship and defects (think 10–25 years).
A performance warranty – guarantees a minimum % of the original output after a certain number of years.
You’ll often see:
Mono panels with longer product warranties and better performance guarantees (especially from top brands).
Poly with similar but sometimes slightly shorter/less generous terms.
Thin-film warranties vary more, depending on the specific product and use case.
When comparing quotes, don’t just look at kW. Look at how long that kW is promised to stick around.
7.3 What That Means for a 20–30 Year Microhomestead Plan
If you’re building a long-term homestead and planning to stay put:
A panel that costs a little more but produces more energy for 25+ years can be a better deal than a cheaper one that fades faster.
That’s often why people lean toward higher-quality mono for their main roof array.
8. Aesthetics and Curb Appeal
Key question: Which looks better, and does that matter for resale?
8.1 How Each Panel Type Looks
Monocrystalline:
Dark, often black cells.
Modern mono panels with black frames and backsheets look sleek and uniform.
Polycrystalline:
Bluish, “sparkly” pattern.
More obvious cell edges, more “old-school solar” look.
Thin-film:
Can look like smooth dark glass or strips laid out on metal roofing.
Often very low-profile.
8.2 Matching to Your Roof
Dark roofs + black mono panels = very clean look.
Light-colored roofs might show off panel edges more.
Thin-film on metal roofing can almost disappear from street level.
If you have an HOA or you care a lot about how your roof looks, aesthetics can be the tiebreaker between two otherwise similar options.
8.3 Aesthetics and Resale Value
Buyers may not know mono vs poly, but they do notice:
“That roof looks good” vs “that roof looks cluttered.”
Whether the system looks modern and thoughtfully installed.
A clean-looking mono array with neat conduit runs and good cable management will usually help resale more than hurt it.
9. Roof Size, Shape, and Structural Limits
Key question: For small or weird roofs, what makes the most sense?
9.1 When Roof Space Is the Bottleneck
If you’re in a small home, townhome, or ADU, you might have:
Just one or two roof faces with good sun
Limited, chopped-up sections between vents and skylights
In those cases, every square foot matters, and monocrystalline usually wins because:
More watts per panel
More kWh per year from the same limited footprint
9.2 Weird Roofs and Obstacles
If your roof has:
Dormers
Turrets
Multiple small planes
Random vents everywhere
You have two main options:
Use high-efficiency mono and carefully tuck panels where they fit.
Or, if you have lots of secondary surfaces (garage, shed, barn), spread the load around.
Thin-film can help on long, uninterrupted surfaces like a big metal barn roof, but on a chopped-up house roof, mono is usually easier to design around.
9.3 Weight and Structural Load
Standard framed crystalline panels (mono and poly) are pretty similar in weight per square foot.
Thin-film can be lighter and lower profile, which can help when:
You’re working with older structures
You want to avoid adding much weight to a shed or carport
You’re bonding to metal roofing without rails
That’s one place where thin-film really shines: big, light, low-pitch structures.
10. Is Thin-Film a Good Choice for Homes?
Key question: Is thin-film only for RVs and sheds, or can it work on a regular house?
10.1 Where Thin-Film Shines
Thin-film can be a great choice when:
You have a huge roof or structure with tons of area.
You’re working with a metal roof that’s perfect for peel-and-stick or clamp-on thin-film.
You care about low weight, low profile, or flexibility (RVs, vans, curved roofs).
On an RV or a small off-grid cabin, thin-film can be a friendly option.
10.2 Where Thin-Film Struggles
On a typical suburban house:
Roof area is limited.
You want to maximize kWh per square foot.
Labor and racking costs matter a lot.
Because thin-film is less efficient, you often can’t hit your desired system size before you run out of space. In that case, mono almost always wins.
Compare solar loan vs lease vs PPA options, see who owns the panels, who gets tax credits, and which deal delivers the biggest long-term savings.
When I first started looking at rooftop solar, I thought the hardest part would be picking panels.
Nope.
The real headache was the contracts.
Three companies came out. All three promised “$0 down solar”. But one pitched a loan, one pushed a lease, and one was obsessed with their PPA (Power Purchase Agreement).
All three companies considered the same sun exposure, roof type, and number of panels. But totally different answers to questions like:
Who owns the system?
Who gets the tax credits?
What happens when I sell the house?
And most importantly: who actually saves the most money?
In this post, I’ll walk you through solar loans vs. solar leasing vs. PPAs in plain English, so you can decide which one actually fits your budget, your risk tolerance, and your plans for your home.
1. Solar Loans vs. Leases vs. PPAs: The Simple Breakdown
Let’s start with quick definitions.
1.1 What is a Solar Loan?
A solar loan works a lot like a car loan or home-improvement loan:
You own the solar system.
A bank, credit union, solar lender, or sometimes the installer finances it.
You make a fixed monthly payment for a set number of years (often 5–20).
Once it’s paid off, the system is yours, free and clear.
You’re basically swapping your electric bill for a loan payment + a smaller electric bill.
1.2 What is a Solar Lease?
A solar lease is like leasing a car:
The solar company owns the system.
You rent the equipment and pay a fixed monthly fee to use it.
That payment might stay flat or have a built-in yearly increase (called an escalator).
You usually have a contract term of 15–25 years.
You don’t pay for the power per kWh. You pay to “rent” the panels.
1.3 What is a PPA (Power Purchase Agreement)?
A PPA is different:
The solar company owns the system, just like with a lease.
You don’t pay to rent the system. Instead, you pay for the electricity it produces.
You pay a set price per kWh (for example, a bit less than your utility rate).
The rate often increases every year by a small percentage unless you negotiate otherwise.
Think of it as switching power providers on your roof rather than at the grid level.
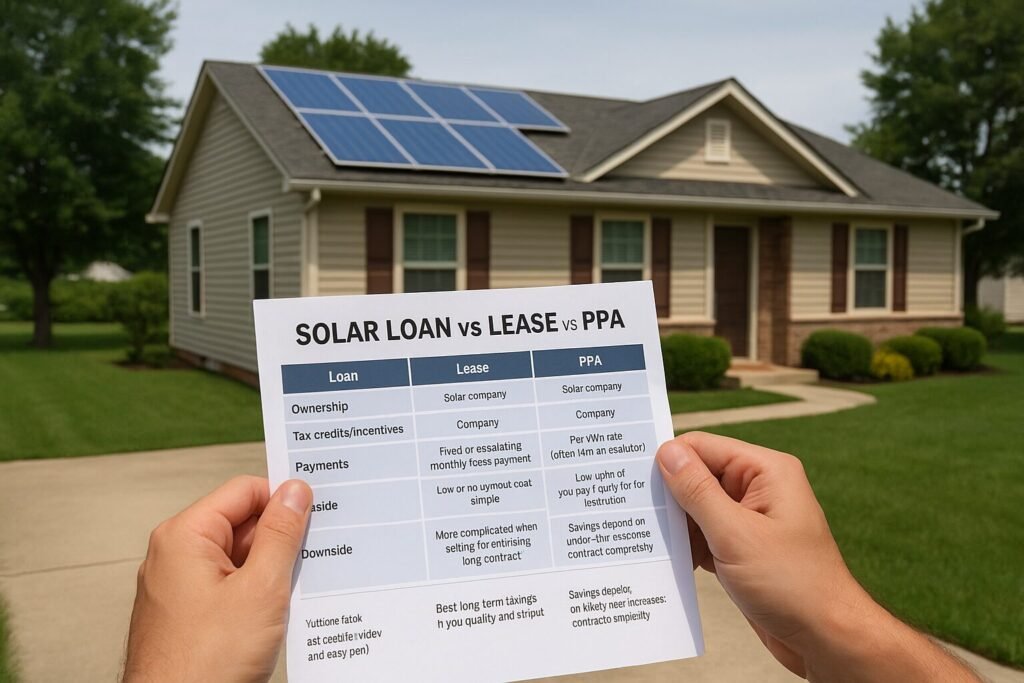
1.4 Quick-Glance Comparison
Here’s the 10-second version:
Loan
Ownership: You
Tax credits/incentives: Usually, you
Payments: Fixed loan payment, then $0
Upside: Best long-term savings if you qualify and stay put
Downside: You take on debt and responsibility
Lease
Ownership: Solar company
Tax credits/incentives: Company
Payments: Fixed or escalating monthly lease payment
Upside: Low or no upfront cost, simple
Downside: More complicated when selling/refinancing; long contract
PPA
Ownership: Solar company
Tax credits/incentives: Company
Payments: Per kWh rate (often with an escalator)
Upside: Low upfront, you pay mainly for what you use
Downside: Savings depend on utility rate increases; contract complexity
2. Who Owns the System—and Why It Matters
Ownership sounds boring, but it affects everything: incentives, resale, control, and long-term savings.
2.1 Ownership with a Solar Loan
With a loan, you own the system from day one. The lender just has a lien or financing agreement, like with a car or home improvement.
That usually means:
You decide on maintenance and repairs.
You can add panels later (assuming the roof and inverter allow it).
The system can be treated as an owned improvement to the property.
2.2 Ownership with a Lease or PPA
With a lease or PPA, the solar company owns the system, not you.
That usually means:
They are responsible for maintenance and performance under the contract.
You often can’t modify the system without their permission.
They decide how and when to upgrade or replace equipment.
2.3 Why Ownership Changes the Math
Ownership decides:
Who gets the tax credits and rebates?
How your home value may be affected.
How easy or hard is it to sell or refinance later?
Whether your savings can grow over time once the loan is paid off.
If you like the idea of solar being a permanent upgrade to your property that keeps paying you back, ownership (loan or cash) is usually more attractive.
3. Who Gets the Tax Credits, Rebates, and Incentives?
This is one of the biggest surprises for many people.
You don’t automatically get the solar tax credit just because the panels are on your roof.
3.1 Loans: Incentives Usually Go to You
With a loan, you’re typically the system owner, so:
You’re usually the one who can claim federal tax credits (if you qualify).
You may also be eligible for state incentives and local rebates.
Some incentives reduce the effective cost of your system significantly.
You do need enough tax liability to actually use the credit, so it’s worth talking to a tax professional for your situation.
3.2 Leases & PPAs: Incentives Go to the Company
With leases and PPAs, the solar company owns the equipment, so:
They usually claim the tax credits and incentives.
In theory, they “pass the savings” to you through lower payments or better terms.
In practice, you’re trusting their pricing to reflect that.
This doesn’t automatically make leases/PPAs bad, but it does mean you’re not stacking incentives on top of your own long-term ownership.
3.3 Incentives Change the Real Cost Comparison
Two neighbors can have the same system size and the same roof, but:
Neighbor A buys with a loan and uses tax credits and rebates to lower the total cost.
Neighbor B signs a lease where the company takes the incentives.
On paper, both got “$0 down.” Over 20–25 years, the financial outcome can be very different.
4. Lifetime Cost and Savings: Who Really Saves the Most?
Everyone loves to show charts with huge savings curves. The tricky part is what assumptions they used.
4.1 Upfront Cost vs. Lifetime Savings
Roughly:
Loans: You may put some money down or go zero-down. You may have a payment that’s similar to your current electric bill at first. Over time, once the loan is paid off, your savings can increase dramatically.
Leases/PPAs: Often no upfront cost. You start saving a bit (hopefully) from day one, but you keep paying for 15–25 years.
If you’re planning to stay put and can handle a loan, ownership tends to win on total dollars saved over the long term.
4.2 Typical Patterns
Solar loan
Best when you stay in the home long enough to pay off or nearly pay off the system.
After the payoff, your electric bill is mostly just residual usage and fixed utility fees.
Solar lease
It can be nice if you want predictable payments and don’t want to own anything.
But you rarely get that “my panels are now basically free” feeling.
PPA
Attractive when they offer a kWh rate noticeably lower than your current utility rate.
Savings depend heavily on how your usage and utility rates change over time.
4.3 Utility Rate Assumptions Matter
Many proposals assume your utility rates will skyrocket every year.
If that happens, your savings look huge. If they don’t, your “guaranteed” savings may disappear.
When you compare loan vs lease vs PPA, always ask:
What utility rate increase did they assume each year?
What PPA or lease escalator did they build in?
If the solar payment is rising faster than your actual utility rates, the deal may get worse over time, not better.
5. Monthly Payments and Cash Flow
Most of us live in a monthly payment world, not a lifetime model world. Let’s talk cash flow.
5.1 Solar Loan Payments
With a loan, you’ll usually see:
A fixed monthly payment for the length of the loan.
A smaller electric bill because the panels offset some of your usage.
For many people, the goal is a “bill swap”:
Electric bill goes down
Solar loan payment ≈ About what you were paying before (or a little less).
The big payoff comes later, when the loan is gone.
5.2 Solar Lease Payments
With a lease, you pay:
A fixed or escalating monthly lease payment, plus
A reduced electric bill (since you’re still connected to the grid).
Your solar payment might start below your old power bill, but if it escalates every year, that gap can close.
5.3 PPA Payments (Pay per kWh)
With a PPA, you:
Pay per kWh for the power your system produces.
Still get a reduced utility bill because you’re buying less power from the grid.
If the PPA rate starts much lower than your utility rate and the escalator isn’t too aggressive, this can produce steady savings. If the rate and escalator are high, your savings may fade.
5.4 Cash-Flow Scenarios
Here’s how I think about it:
Tight monthly budget, no savings, short time horizon Lease or PPA might be appealing because of the low upfront cost and simple structure.
Steady income, plan to stay in the home 10+ years, okay with a loan A loan can give the best balance of reasonable monthly payment + strong long-term savings.
6. Selling Your Home with a Loan, Lease, or PPA
This is the part almost nobody thinks about until it’s too late.
6.1 Selling with a Solar Loan
You usually have two main options:
Pay off the loan at closing using sale proceeds.
The buyer gets a home with owned solar and no solar payment.
Transfer the loan to the buyer (if the lender allows it).
The buyer takes over the solar payment.
Many buyers like the idea of owning solar, especially if you can show:
Past electric bills
Production data
Warranty information
6.2 Selling with a Solar Lease or PPA
With leases and PPAs, you typically:
Try to transfer the contract to the buyer, or
Buy out or prepay the remaining term (if allowed).
Here’s the catch: not every buyer wants to inherit a 20+ year contract they didn’t sign.
If the buyer refuses to assume the lease/PPA, you may need to:
Pay a buyout amount, or
Negotiate with the solar company for another solution.
6.3 Tips to Avoid Resale Headaches
Before signing anything, ask:
How many homes with your contracts have sold in this area?
What does the transfer process actually look like?
Is there a buyout schedule in writing?
Will there be any liens or UCC filings on the property?
If you know you might move in the next 5–7 years, the fine print around resale is just as important as the monthly payment.
7. Home Value and Refinancing
Solar can be a selling point—or a sticking point.
7.1 Owned Systems (Loans or Cash)
When the system is owned (loan paid off, or you plan to pay it off at sale):
Appraisers may treat solar as a value-adding improvement, especially with good documentation.
Buyers often see lower electric bills as a big plus.
Refinancing is usually cleaner when the system is owned or when the loan is just another line of debt.
7.2 Leased or PPA Systems
With a lease or PPA:
Some buyers like getting lower electric bills without buying the system.
Others are wary of long-term contracts, escalators, and “one more bill.”
Lenders and appraisers may treat the system differently from owned solar.
The key is transparency. Have:
The full contract is ready.
A clear summary of monthly payments, escalators, and the remaining term.
Data showing actual savings if you’ve had the system for a while.
7.3 Solar and Refinancing
Depending on how the financing is structured:
A solar loan may show up as standard debt.
Some financing uses UCC filings or other mechanisms that your mortgage lender will want to see.
If you know you plan to refinance soon, it’s worth asking both the solar lender and your mortgage lender how a new solar contract or loan will be treated.
8. Escalator Clauses and Utility Rate Risk
This is where a lot of people get burned.
8.1 What is an Escalator Clause?
An escalator is a built-in annual increase in your:
Lease payment, or
PPA kWh price.
It might be something like 2–3% per year.
That sounds tiny, but over 20–25 years, it adds up.
8.2 When Escalators Break Your Savings
If your solar payment rises faster than:
Your utility rates, or
Your income,
Then long-term savings can shrink or even vanish.
Always ask:
What is the annual escalator on this contract?
Could I get a flat-rate option (even if the first-year price is higher)?
8.3 What if Utility Rates Don’t Rise as Fast as Promised?
Many proposals assume very aggressive utility rate increases.
If your utility rates don’t cooperate:
A lease or PPA with a high escalator can end up more expensive than just staying with the utility.
A loan with a fixed payment looks better and better over time, because your payment stays flat and the panels keep producing.
Conservative assumptions are your friend. I’d rather be pleasantly surprised than disappointed.
9. Contract Terms and the End of the Line
Solar contracts are long—often longer than car loans and sometimes longer than mortgages.
9.1 Common Term Lengths
Loans: typically 5–20 years
Leases: often 15–25 years
PPAs: often 15–25 years
Equipment warranties and production guarantees may have their own timelines.
9.2 End-of-Term for a Solar Lease
At the end of a lease, you often get choices like:
Renew the lease (sometimes at a different rate)
Buy the system (for a set price or fair market value)
Have them remove the system
Make sure those options (and how the buyout is calculated) are in the contract, not just something the salesperson says.
9.3 End-of-Term for a PPA
PPAs work similarly:
You might get an option to extend the PPA,
Buy the system, or
Have it removed.
Again, the details matter. Don’t rely on “Oh, we’ll work something out.”
9.4 End-of-Term for a Solar Loan
With a loan, the end is simple:
You make the last payment.
You own the system outright.
Panels usually still produce a significant percentage of their original output.
That’s when the real “free-ish power” feeling kicks in.
10. How to Decide: Loan vs. Lease vs. PPA
Here’s the part where we tie it all together.
10.1 Start with Your Priorities
Ask yourself:
Is my top priority maximum long-term savings?
Is it the lowest possible upfront cost?
Is it simplicity and low mental overhead?
How long do I realistically see myself staying in this home?
10.2 When a Loan Might Make Sense
A solar loan often fits if:
You have a decent credit score and can qualify for reasonable rates.
You plan to stay in the home for at least 7–10 years.
You’re okay with taking on a fixed monthly payment in exchange for owning the system.
You want to claim tax credits and build home value.
10.3 When a Lease or PPA Might Fit
A lease or PPA might make sense if:
You want low or no upfront cost.
Your credit is okay, but you don’t qualify for great loan terms.
You value simplicity and don’t want to be responsible for equipment.
You’re okay trading maximum savings for lower effort and less responsibility.
If you go this route, the key is to fight for good terms:
Reasonable escalator (or none)
Clear transfer and buyout language
Transparent end-of-term options
10.4 Red-Flag Situations
Slow down and get more quotes if:
The salesperson can’t clearly explain who owns the system.
They gloss over tax credits or refuse to show how they’re factored in.
You can’t get a straight answer about escalators or end-of-term options.
You feel rushed, pressured, or told “this deal expires tonight.”
You’re signing a contract measured in decades, not months. You’re allowed to sleep on it.
11. Common Questions Asked by Homeowners
1. What’s the difference between a solar loan, a solar lease, and a PPA?
Loan: You own the system, pay it off over time.
Lease: You rent the system for a monthly fee.
PPA: You pay per kWh for the power the system generates.
2. Which option usually saves the most money long-term? If you qualify for a good rate and stay in the home, a loan + ownership usually wins over 20–25 years. Leases and PPAs can still save money, but often cap your upside.
3. Who owns the panels under each option?
Loan: You.
Lease/PPA: The solar company.
Ownership affects everything from tax credits to home value.
4. Who gets the tax credits and rebates?
Loan (ownership): Usually, you (if you qualify).
Lease/PPA: Usually, the solar company.
5. How do monthly payments compare?
Loan: Fixed payment + smaller electric bill.
Lease: Fixed or escalating lease payment + smaller electric bill.
PPA: Pay per kWh at a contracted rate + smaller electric bill.
6. What happens if I want to sell my house?
Loan: You can pay off at closing or sometimes transfer it to the buyer.
Lease/PPA: You either transfer the contract to the buyer or buy out/presolve it.
7. How do these options affect home value and refinancing? Owned systems tend to be cleaner for appraisals and refinancing. Leases/PPAs can add complexity and depend heavily on buyer perception and lender policies.
8. Are there escalator clauses with leases and PPAs? Often yes. Many leases/PPAs have annual payment or rate increases. You want to know exactly what they are and compare them to realistic utility rate increases.
9. What if utility rates don’t rise as fast as expected? If your utility rates stay flatter than projected, leases and PPAs with escalators can end up saving less than promised—or even costing more over time.
10. What happens at the end of a lease or PPA term? You may be able to renew, buy the system, or have it removed. The exact options and prices should be in the contract.
11. How do I choose based on my credit, budget, and time in the home?
Good credit, long time horizon, want max savings → Loan/ownership.
Shorter time horizon, minimal upfront cash, okay with long contracts → Carefully chosen lease/PPA.
Unsure? Get quotes for all three and run side-by-side comparisons with conservative assumptions.
12. Real-World Mini Scenarios
Just to make this more concrete, here are a few common patterns.
Scenario 1: Long-Term “Forever Home” Folks
Plan to stay 15–20+ years
Good credit
Stable income
A loan often makes sense. You get the incentives, build home value, and eventually enjoy years of power with no loan payment.
Scenario 2: Retiree Unsure How Long They’ll Stay
May move in 5–7 years
Wants lower bills but doesn’t want more “stuff” to manage
A carefully structured lease or PPA might be okay if the resale and transfer terms are crystal clear and reasonable.
Scenario 3: Budget-Constrained but Wants Solar Now
Very tight budget
No savings for upfront cost
Just wants a lower bill today
A PPA or lease may provide immediate relief without a big cash outlay. The key is to avoid aggressive escalators and understand the long-term trade-off.
13. Wrapping It Up: Don’t Just Pick “$0 Down”—Pick the Right Structure
Solar is one of those things where the hardware is only half the story.
The other half is the contract.
Loans, leases, and PPAs can all make sense for the right person.
Ownership (via a loan or cash) usually gives the best long-term payoff, especially if you’ll be in your home for a while.
Leases and PPAs can be useful tools—but they need extra scrutiny around escalators, transfer rules, and end-of-term options.
If you’re in the middle of quotes right now, here’s what I’d do next:
Get at least one proposal in each format: loan, lease, PPA.
Ask each company to clearly spell out: ownership, incentives, escalator, term, transfer rules, and end-of-term choices.
Run the numbers with conservative utility rate assumptions, not just their rosy chart.
See the real costs of going solar—panel upgrades, R&R, permits, fees, financing traps, and policy risks—plus scripts and checklists to protect your budget.
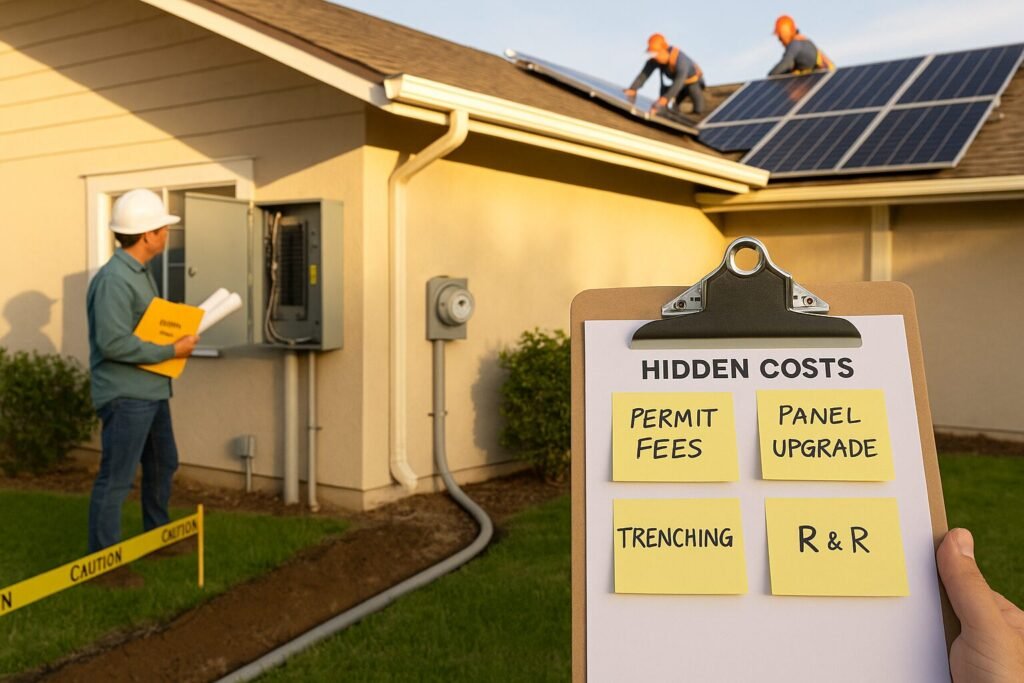
I love solar. But I’ve also seen “all-in” quotes turn into surprise invoices. When I helped a neighbor here in Hawaii compare bids, the cheapest proposal ballooned after the site visit: a main service-panel upgrade, longer conduit run, and a utility meter change. None of it was in the first quote. That experience pushed me to create this guide—so you can spot the hidden costs of solar before you sign.
Use this like a field manual. Skim the TL;DR box, then jump to the sections that match your home. I’ll share the questions I ask installers, the red flags I look for, and simple steps to protect your budget.
TL;DR Snapshot (Skimmer Box)
Panel upgrade? Ask for a written load calculation and a capped allowance for service work.
Roof near end-of-life? Get remove & reinstall (R&R) pricing locked in now.
Permits + utility fees: Request a line-item list. Who pays for resubmittals?
Trenching & conduit: Demand a site map with measured runs before you sign.
Production shortfalls: Get a performance guarantee with clear remedies.
Monitoring & maintenance: Confirm lifetime portal access and who pays for truck rolls.
Replacement horizon: Budget for inverter and battery swaps later.
Insurance: Ask your insurer about premium changes and documentation.
Financing: Watch for dealer fees, origination, and prepayment penalties.
Leases/PPAs: Check escalators, buyout tables, and transfer rules.
Policy risk: Stress-test ROI for TOU windows, export credits, and fixed charges.
What’s In vs. Out of Your Quote (Scope Map)
Quotes often look comprehensive but hide “exclusions” and “assumptions.” These become change orders later.
Common inclusions
Modules, racking, inverter(s) or microinverters/optimizers
Single roof plane wiring runs, standard attachments
Standard permit and inspection coordination
Common exclusions
Main service panel (MSP) upgrades or meter combos
Roof repair/replacement or future R&R
Trenching, hardscape/landscape restoration
Structural engineering upgrades for wind/snow
Utility interconnection fees and resubmittals
Monitoring subscriptions, cellular gateways, and API access
Pest abatement/critter guards, cleaning, and data SIM fees
Pro move: Ask for a scope matrix that lists each item as Included / Excluded / Allowance with dollar caps.
Electrical: Main Service Panel, Wiring & Interconnection
I always start here because electrical surprises are expensive.
When you might need an MSP upgrade
Existing panel at capacity (no spaces, hot busbar)
The 120% rule is exceeded with back-feed breakers
Utility requires a meter/main combo or service relocation
High continuous loads (EVs, heat pumps) push ampacity limits
Hidden cost drivers
Panel size (e.g., 100A → 200A), service drop/conductor upgrades
AFCI/GFCI requirements, relocation, stucco or masonry work
Revenue-grade meters, current transformers (CTs), production meters
What to ask
“Please include a written load calculation and interconnection method (line-side tap vs. breaker).”
“If an MSP upgrade is needed, cap it at $X (allowance).”
“List utility fees and whether you or the installer pays them.”
Roof Readiness & Future Reroof Costs
Panels can outlast shingles. If your roof is at the end of its life, consider replacing it before installation.
Key questions
What’s the roof age and condition? (Get a roof inspection report.)
Who warrants leak penetrations, and for how long?
If I reroof later, what’s the R&R price—locked in writing?
Pro move: Ask the installer to include R&R labor pricing now. Future-you will be grateful.
Permits, Plan Review & Utility Interconnection Fees
Soft costs add up.
You might see
City/county permit and plan-check fees
Structural stamps when required
Utility application, engineering study, inspection, and Permission to Operate (PTO) fees
Time traps
Resubmittals after plan review comments
Utility queue delays and re-inspection fees
What to ask
“Provide a line-item list of all permit/plan/utility fees and who pays each.”
“What’s the expected PTO date and who handles resubmittals?”
☐ Warranty covers parts + labor (and leak warranty period)
☐ R&R pricing for future reroof (locked amount)
☐ Interconnection responsibilities + target PTO date
☐ Financing disclosures (dealer fee %, penalties)
☐ Lease/PPA escalator and buyout table attached
“Ask Your Installer”
Please include a load calculation and identify the interconnection method.
List all permit/plan/utility fees and who pays them.
Attach a site map with measured conduit and trenching.
Provide the shade study (images/heatmap) and expected performance ratio.
Spell out the performance guarantee and the remedy if under-produced.
Confirm lifetime monitoring and any cellular fees.
Clarify warranty (parts and labor) and who handles RMAs/truck rolls.
Lock R&R pricing for a future reroof in writing.
Disclose dealer fee %, origination, and prepay rules.
For leases/PPAs, include the escalator, buyout table, and transfer steps.
Example Scenarios (Mini Case Studies)
A. Roof at 18 years Reroof now + solar once = no mid-life R&R cost and one set of penetrations. Waiting two years would have meant paying for R&R and risking schedule chaos.
B. 100A panel + EV on the way Installer A ignored it; Installer B showed a load calc and capped an MSP upgrade. The “cheaper” bid wasn’t cheaper after the inevitable change order.
C. TOU shift & evening peaks Modeling a later peak pushed the homeowner to add a small battery for load shifting. Savings were steadier even after export credits dropped.
Key Takeaways & Next Steps
Surprises are optional. Most “gotchas” are visible if you know where to look.
Demand specifics in writing. Load calcs, site maps, fee lists, and guarantees.
Budget realistically. Include one-time adders, recurring costs, and future reserves.
Stress-test your ROI: policy, TOU, and export credit changes—plan for them.
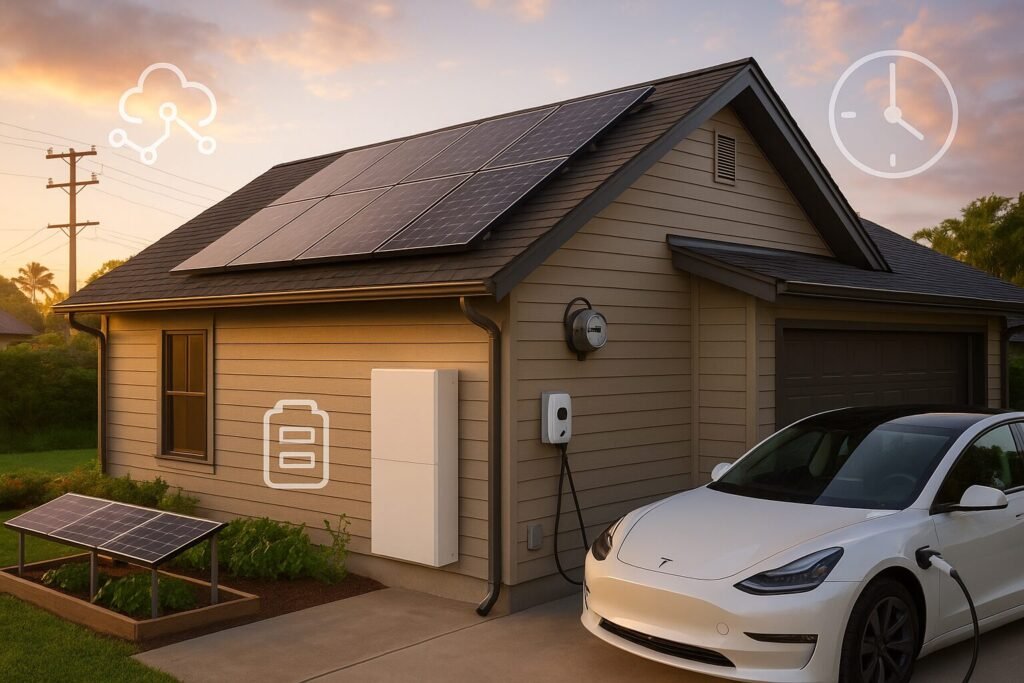
Panels, batteries, rates, VPPs, and permits—see what’s changing in solar over the next 5 years and how to plan a smart, resilient system.
Hi, I’m Crazy Old Prepper. I live small, tinker constantly, and I’m building a micro homestead one practical project at a time. Here’s what I’m watching in solar over the next five years—and how I’d plan a system today so it still feels smart in 2030.
TL;DR Snapshot (Skimmers start here)
Panels: You’ll see more back-contact / heterojunction / TOPCon first; perovskite tandems will appear in niche retail SKUs, then spread. Expect modest, real-world efficiency bumps on rooftops before major leaps.
Prices: Hardware keeps trending down long-term, but soft costs (labor, permitting, interconnection) and tariff/supply swings can whipsaw quotes.
Batteries:LFP (and variants) rule for safety + cycle life; faster installs and clearer throughput warranties.
Policy: More net billing and time-of-use → batteries move from “nice” to “often worth it.”
Blackouts: Typical homes land around 10–30 kWh storage with 7–15 kW PV if backup matters.
VPPs: Virtual power plants expand; payouts depend on your utility + event frequency.
Permitting: “Instant” approvals spread where AHJs adopt standardized checks.
New use cases:Agrivoltaics, balcony kits, and smarter microinverters open doors for small spaces and small farms.
Skim-Stopper: Buy Now or Wait?
If your roof is ready, rates are moving to TOU/net billing, and you want blackout resilience, buying now with battery-ready wiring (or a modest starter battery) usually beats waiting for the “next big panel.” If your roof is tight on space, it can be worth waiting for higher-efficiency modules—but I’d still pre-wire.
1) What New Panel Tech Actually Reaches Homes?
I love reading lab headlines, but I plan purchases around what installers can get, warrant, and service.
What’s real between now and 2030
Back-contact / HJT / TOPCon continue to replace older PERC: slightly higher module efficiency, better temperature coefficients, and lower degradation.
Perovskite-silicon tandems: pilot lines and early retail models appear first in premium ranges; ramp depends on durability, encapsulation, and bankability.
Bifacial on rooftops: helps in high-albedo settings (white roofs, bright ground), less so over dark shingles.
Roof-reality vs. datasheets
Nameplate jumps don’t always equal kWh gains after you factor tilt, azimuth, shading, soiling, wiring, inverter clipping, and performance ratio.
Match financing to your goals: cash, loan, lease/PPA.
Pick the right design: string vs microinverters/optimizers; battery-ready.
Trust but verify: reputation, monitoring, service SLAs—plus roof and incentives details.
Introduction: The quote that made me pause
When I got my first solar quotes, the sales pitch was smooth. The numbers looked great. Then I asked for the license number and insurance cert—and the tone changed. That moment taught me the difference between a friendly salesperson and a professional solar installer who will stand behind their work for 25+ years.
If you’re feeling a little overwhelmed by acronyms (NABCEP, PR, NOCT), rate plans, and warranty fine print—breathe. In this guide, I’ll walk you through exactly how I vet installers, what I request in writing, and the red flags I avoid. It’s simple, repeatable, and it works whether you’re grid-tied, hybrid, or planning a battery later.
Tip 1: Verify Credentials (License • Insurance • NABCEP)
Goal: Confirm you’re hiring a qualified, insured contractor—not a pass-through sales outfit.
What I ask for (in writing, as PDFs):
State contractor license number + link to the state lookup page.
General liability (commonly $1M+) and workers’ comp certificates with active dates.
NABCEP certificate number and credential (e.g., PV Installation Professional).
In this post, I will share valuable tips on how to choose a solar installer that best fits your needs.
In this article, I will explain how to choose a solar installer to ensure you make the best decision for your solar needs.
In this guide on how to choose a solar installer, I’ll walk you through exactly how I vet installers, what I request in writing, and the red flags I avoid.
In this article, I will also share insights on how to choose a solar installer effectively.
In this guide on how to choose a solar installer, I’ll walk you through exactly how I vet installers, what I request in writing, and the red flags I avoid.
In this guide, I’ll also explain how to choose a solar installer to ensure you make the best decision for your needs.
Quick checks:
License is active, classification includes solar/PV, and company names match.
The insurance holder is the same entity on the contract.
The NABCEP credential is current and actually tied to the people overseeing your job.
In this guide on how to choose a solar installer, I’ll walk you through exactly how I vet installers, what I request in writing, and the red flags I avoid.
Red flags: “Our partner is licensed,” expired policy dates, and no NABCEP anywhere on the team.
Skim-Stopper: Ask, “Who is the license holder of record for my project?” Write the name down.
Tip 2: Warranties You Can Actually Use
Not all warranties are equal. Get documents, not promises.
Roof Condition, Structural Work, and Leak Liability
Before anyone steps on the roof, align on conditions and responsibilities.
Request a pre-install photo log of decking, underlayment, penetrations, and attic areas.
If a reroof is coming within ~3–5 years, strongly consider doing it first.
Clarify who pays if hidden damage is found.
Get leak liability and response times in writing.
Incentives & Taxes (ITC + State/Utility)
The federal Investment Tax Credit may apply if you own the system; you typically claim it in the year it’s placed in service.
Some rebates can reduce your project’s tax basis; certain production credits may be taxable income.
Leases/PPAs: the system owner (often the financier) usually claims the credits.
Many states/utilities offer incentives or export/buyback programs—ask who files that paperwork and when.
Pro tip: Look up incentives in one place with databases like DSIRE. Ask your installer to list every program they’re assuming.
15 Questions to Ask at the Site Visit
Who is the license holder for my project?
Will you use employees or subs? Who carries workers’ comp?
Can I see the shade study file and the assumed PR/degradation?
Which rate plan and export/buyback did you model?
Why this inverter architecture for my roof?
Is the system battery-ready? Which models integrate cleanly?
Will I need a main-panel upgrade? Who coordinates it?
How will conduit be routed (aesthetic plan)?
What’s the monitoring platform and alerting?
What’s your response SLA for leaks/inverter faults?
Do you install critter guards or corrosion-resistant hardware for coastal sites?
What’s the roof-penetration detail (flashing, sealants)?
Who handles permits and interconnection paperwork?
What are the warranty exclusions I should know about?
Can I speak to two recent local customers?
Red Flags & Deal-Breakers
Won’t share license/insurance PDFs or the shade file.
Vague equipment models (“Tier 1 panels”).
Savings claims based on old net metering rules.
Pushy “today-only” discounts.
No written roof-leak coverage or service SLA.
Mini-FAQ
Are microinverters worth it on a simple south roof? If shade is minimal and the roof faces due south, a quality string inverter can be efficient and cost-effective. Microinverters add module-level monitoring and shade resilience; decide based on roof complexity and future expansion.
Can I add batteries later? Yes—if the system is designed for it. Confirm communications compatibility and breaker space now to avoid rework later.
What if I need a reroof in 3 years? Either reroof first or plan for detach & reset costs later. Get both numbers now.
Who handles interconnection? The installer usually submits and tracks the interconnection. Ask for a copy of the final permission-to-operate (PTO).
Practical Takeaways
Standardize quotes. You’ll see who’s real fast.
Get every promise as a document.
Choose a design for your roof and goals, not a sales script.
Tie financing to ownership and incentives.
Service after the sale matters for 10–25 years—treat it that way.